Make a 3D-Printed Animatronic Halloween Mask
Print a mask, finish it so it doesn't look printed, then add servos and an Arduino so the jaw or eyes move — the steps and the parts for each one.
Published October 4, 2026 · 7 picks
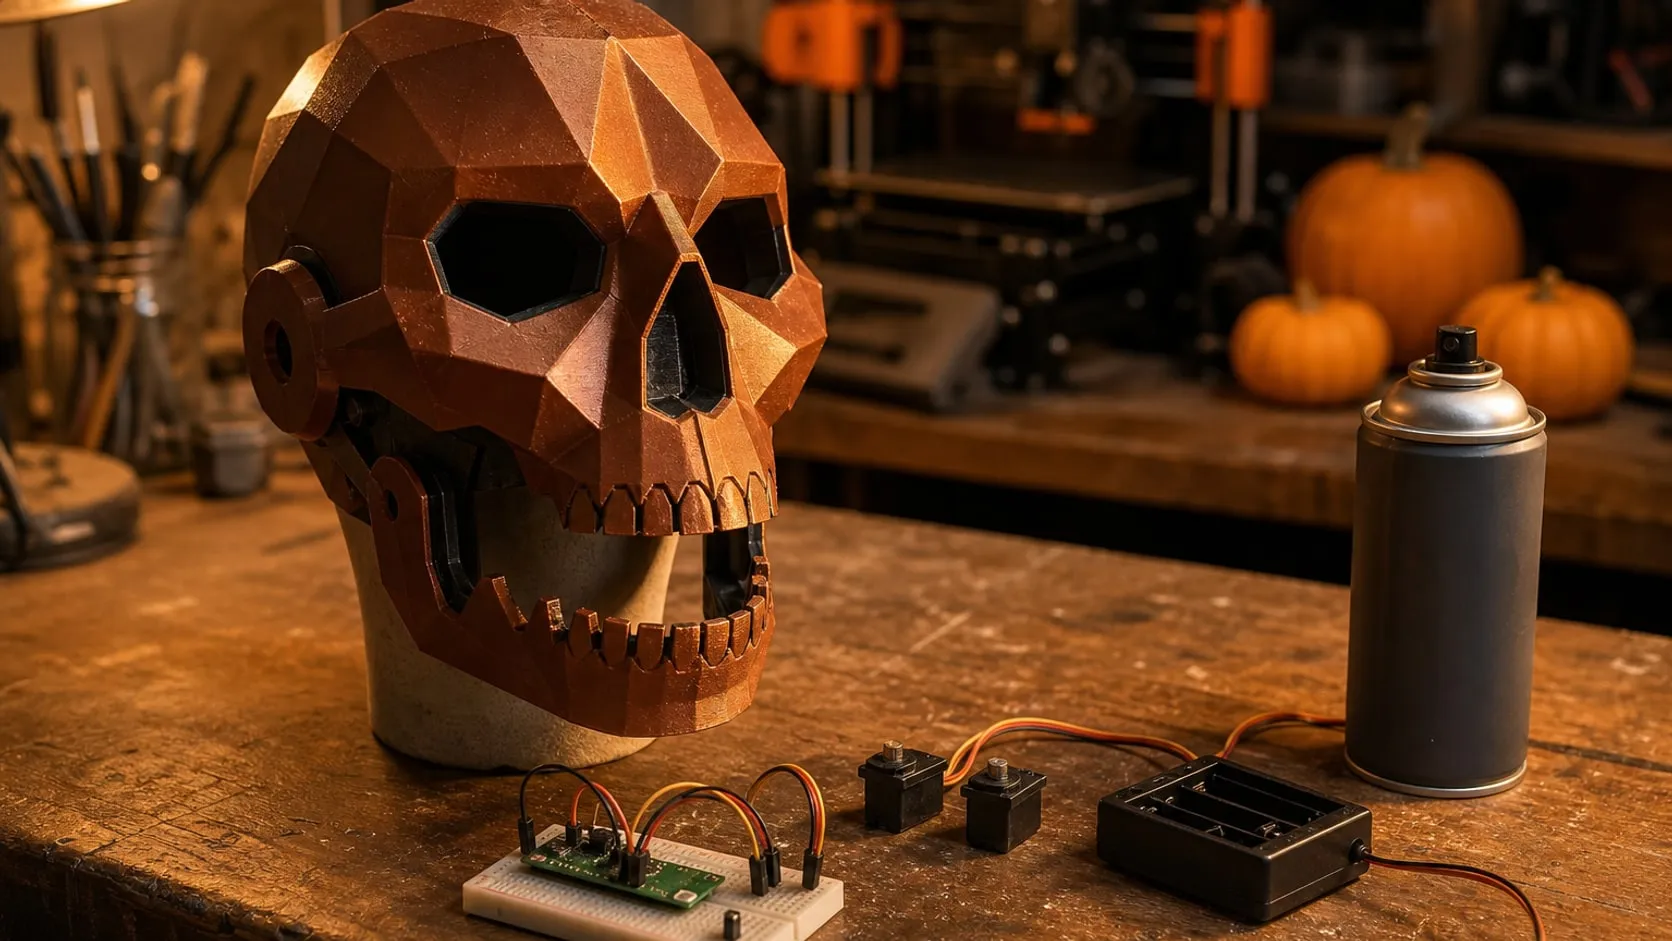
A printed mask looks good in photos. A printed mask whose jaw drops or whose eyes follow people looks great on video, and that’s why animatronic masks keep showing up in Halloween feeds. The movement is simpler than it looks: one or two small servos, a microcontroller and a battery pack. Here’s the whole build, step by step, with the parts for each step below.
Step 1: Pick a model and plan the movement
Start with a mask model designed for movement. Sites like MakerWorld and Printables have Halloween masks with a separate jaw or eye pieces and servo mounts already modeled in, which saves most of the design work. If you’re adapting a static mask, keep the first project simple:
- One movement. A hinged jaw or a pair of eyes that look left and right. Add more later.
- Short levers. A small servo moves a light part over a short distance well; a long, heavy jaw is a different project.
- Room behind the face. Servos, wiring and the board need space that doesn’t touch your nose, cheeks or eyes.
- Use models you’re allowed to print, and check the license if you plan to sell or share the result.
Step 2: Print the mask
Print the shell in PLA Pro or a similar impact-modified PLA, which handles flexing and knocks better than standard PLA. A few practical settings:
- Walls over infill. 3–4 walls and low infill give a strong, light shell.
- Supports only where needed. Tree or organic supports leave fewer marks on the face.
- Print moving parts separately. The jaw, eyes and any hinge pins come off the bed as their own parts.
For straps or a chin cup, consider TPU: a flexible print sits against the skin far more comfortably than rigid PLA.
Step 3: Sand and prime
This is the step that makes the mask look cast instead of printed. Sand off support marks first, then spray a thin coat of sandable filler primer. Once dry, sand it back with 320 grit; primer stays in the layer lines and the surface gets flatter. Repeat with 400 and 600 until the lines are gone.
Spray outdoors or in a ventilated area, wear a respirator rated for paint fumes, and wet-sand to keep the dust down.
Step 4: Paint
Spray a base color over the primer, then add the detail: dark washes in the recesses, dry-brushed highlights on the raised edges, and gloss on the eyes and teeth. Acrylic craft or hobby paints work well over a primed print. Finish with a matte clear coat so the paint doesn’t rub off where your hands grab the mask.
Paint the moving parts separately and check they still move freely afterward; paint in a hinge acts like glue.
Step 5: Mount the servos and linkages
Screw the servos into their mounts with the screws in the servo box. Connect each servo horn to the moving part with a short pushrod: a stiff steel wire with a Z-bend or a small clevis at each end, or a printed link with M2 screws. Before you tighten anything, center the servo at 90° in code so the mechanism has equal travel both ways.
Move every part by hand through its full range. If it binds, fix the hinge, not the servo; a stalled servo heats up and draws its maximum current.
Step 6: Wire and program
Connect each servo’s signal wire (orange or yellow) to a PWM pin on the Arduino Nano, its red wire to the battery pack’s positive and its brown or black wire to ground. Connect the battery ground and the Arduino’s GND together, or the servos won’t understand the signal.
A minimal jaw sketch with the built-in Servo library:
#include <Servo.h>
Servo jaw;

void setup() { jaw.attach(9); }

void loop() {
  jaw.write(70);                      // open
  delay(random(150, 400));
  jaw.write(110);                     // closed
  delay(random(800, 3000));           // irregular pauses look alive
}
Random delays are the trick: a fixed rhythm looks mechanical, an irregular one looks like the mask is thinking. Add a button or a sound sensor later to trigger movement on cue.
Step 7: Power it
Power the servos from four AA NiMH cells in a holder with a switch: 4.8 V sits inside the micro servos’ rated 4.8–6 V range. Power the Nano separately from a small USB power bank through its USB port; the servos then can’t brown out the board when they all move at once. Keep the batteries in a pocket or on a belt and run one cable up to the mask; it’s lighter on the face and keeps cells away from your head.
Step 8: Test it, then wear it safely
Run it on the bench for an hour before you put it on. Then:
- Keep vision and airflow clear. Eye holes you can see through and a nose or mouth opening you can breathe through matter more than any effect.
- Cover the mechanism. Hair and fingers can get caught in a moving linkage; a printed cover or fabric liner keeps them out.
- Fuse the battery and keep wires away from where they can be pinched or pulled.
- Have a quick way off. A strap with a buckle or magnet clasp beats a tight pull-over mask if anything goes wrong.
What it costs in time: one or two days of printing for a full-size mask, an evening or two of sanding, priming and paint, and an evening for the servos, wiring and code. The parts for each step are below.
At a glance
7 picksAs an Amazon Associate I earn from qualifying purchases. If you buy through a link on this page we may earn a small commission, at no extra cost to you. How this works.
Polymaker PolyLite PLA Pro Filament, 1.75 mm, 1 kg, Black
Tougher-than-standard PLA for a thin shell that gets worn and bumped.
A mask is a big, thin shell that gets pulled over a head, bumped in doorways and thrown into a bag at the end of the night. Regular PLA prints it fine but can crack along the layers when it flexes. A tougher PLA keeps the easy printing and gives the shell more room before it snaps.
Black is a practical choice for a Halloween mask: any spot the paint misses, such as the inside of the eye holes, disappears instead of showing up as a bright plastic color.
Pro tip Print the mask with 3–4 walls instead of heavy infill. A thin shell with solid walls is lighter on the face and stronger at the edges than a thick, mostly empty one.
Why we like it
- ✓Higher impact resistance than standard PLA, Polymaker says
- ✓Prints at ordinary PLA settings (210–230 °C nozzle, 20–60 °C bed)
- ✓±0.02 mm diameter tolerance
- ✓Cardboard spool, many colors on the same listing
Keep in mind
- !Still PLA — it softens in a hot car or near a heat gun, so a mask left in the sun can warp
- !The listing mixes "old" and "new formula" colors, so check which one you're ordering
- Material
- PLA Pro (impact-modified PLA)
- Diameter
- 1.75 mm ± 0.02 mm
- Weight
- 1 kg
- Nozzle
- 210–230 °C
- Bed
- 20–60 °C
- Model
- PA07001
3M Wetordry Sandpaper 03024, Assorted 320–800 Grit, 5 Sheets
Fine grits for sanding primer smooth between coats, wet or dry.
This pack starts where primer starts. 320 knocks down the first primer coat, 400 and 600 smooth the second, and 800 gets the surface ready for a glossy color coat. Wet sanding with a little water keeps the paper from clogging with primer dust and keeps that dust out of the air.
It’s sold for automotive blending, but the grits are the same ones prop makers use on primed prints.
Pro tip Wrap the paper around a pencil, a dowel or a scrap of foam for the curves around the eyes and nose. Flat paper on a curved face sands through the primer on the high points first.
Why we like it
- ✓Four grits in one pack — 2 × 320, plus 400, 600 and 800
- ✓Use wet or dry; wet sanding keeps the dust down
- ✓Silicon carbide abrasive
- ✓Small 3 2/3 × 9 in sheets, easy to cut into strips for tight spots
Keep in mind
- !No coarse grit — for big blobs or support scars you'll want 120–220 grit first
- !Five sheets go quickly on a full-size mask
- Grits
- 320 (×2), 400, 600, 800
- Sheet size
- 3 2/3 × 9 in (9.3 × 22.8 cm)
- Abrasive
- Silicon carbide
- Use
- Wet or dry
- Model
- 03024
Rust-Oleum 249415 Automotive Sandable Primer, Gray, 12 oz (2-Pack)
Sandable gray primer that fills layer lines before color.
FDM layer lines are hard to see on bare plastic and obvious under paint. A sandable primer fills the shallow grooves between layers; sanding it back leaves primer in the low spots and smooths the high ones. Two or three rounds of spray and sand take a print from “3D printed” to “cast”.
Gray is the useful color here. It’s neutral enough to show scratches, pits and seams, so you can fix them before the color coat makes them permanent.
Pro tip Spray light coats from about 10–12 inches (25–30 cm) and keep the can moving. One heavy coat runs, fills the details you modeled and takes far longer to cure.
Why we like it
- ✓Wet- or dry-sandable, so you can sand it back between coats
- ✓Dry to the touch and recoatable in 10 minutes, Rust-Oleum says
- ✓Flat gray shows every remaining flaw before the color coat
- ✓Two 12 oz cans — enough for several coats on a full mask
Keep in mind
- !Oil-based spray with strong fumes — outdoors or in a well-ventilated space only
- !Sold for wood, metal and fiberglass; test it on a scrap print before spraying the mask
- Volume
- 2 × 12 oz (340 g)
- Color
- Gray, flat finish
- Dry to touch
- 10 min (Rust-Oleum)
- Coverage
- Up to 15 sq ft per can
- Type
- Oil-based aerosol
- Model
- 249415
Miuzei MG90S Metal Gear Micro Servo (2-Pack)
Metal-gear micro servos small enough to hide behind a jaw or eyes.
The MG90S is the same size as the common blue SG90 hobby servo, but its gears are metal. That matters in a mask: a jaw that gets pushed by hand, or a linkage that jams, strips plastic gear teeth quickly.
At about 2 kg·cm, one servo moves a lightweight printed jaw or a pair of eyelids through short pushrods. Heavier parts, or long levers, need either a bigger servo or a shorter arm on the horn.
Pro tip Center the servo in code (90°) before you screw the horn on. Then the horn sits in the middle of its travel and the mechanism can move the same distance both ways.
Why we like it
- ✓Metal gears, tougher than the plastic-gear SG90
- ✓2.0 kg·cm stall torque and 0.08 s/60° at 6 V, Miuzei says
- ✓4.8–6 V — runs directly from a 4 × AA NiMH pack
- ✓13.5 g each, with horns and mounting screws in the box
Keep in mind
- !180° range only, no feedback — the Arduino tells it where to go, it can't report back
- !Hobby-grade servos can buzz or jitter at rest; noticeable inside a quiet mask
- Torque
- 2.0 kg·cm (6 V)
- Speed
- 0.08 s / 60° (6 V)
- Voltage
- 4.8–6 V
- Rotation
- 180°
- Weight
- 13.5 g
- Gears
- Metal
- Pack
- 2 servos + horns + screws
Arduino Nano (A000005)
A small genuine Arduino that drives the servos and reads a button.
For a mask, the microcontroller has three jobs: send position signals to the servos, read a button or a sensor, and add a little randomness so the movement doesn’t look like a loop. The Nano does all of that, and the standard Servo library that comes with the Arduino IDE handles the servo signals.
The pre-soldered headers let you build the whole circuit on a breadboard first and move it into the mask only once the movement looks right.
Pro tip Don’t power the servos from the Nano’s 5V pin. Give them their own battery and connect only the grounds together; a servo pulling current through the board can reset it mid-movement.
Why we like it
- ✓Genuine Arduino board (ATmega328P), not a clone
- ✓14 digital I/O pins with PWM, plus 8 analog inputs
- ✓Programs over USB from the free Arduino IDE
- ✓Headers already soldered — fits a breadboard straight away
Keep in mind
- !Mini-USB, not USB-C — you may need an older cable
- !No Wi-Fi or Bluetooth; for phone control you'd need an ESP32 board instead
- Microcontroller
- ATmega328P
- Digital I/O
- 14 (PWM capable)
- Analog inputs
- 8
- USB
- Mini-USB
- Software
- Arduino IDE
- Model
- A000005
Panasonic eneloop AA Rechargeable Batteries, BK-3MCCA4BA (4-Pack)
Four NiMH cells give 4.8 V, right in the servos' range.
Servos want a supply that can deliver a burst of current every time they move. A pack of AA NiMH cells does that well, and four of them in series sit at the low end of what micro servos are rated for, so there’s no voltage regulator to add.
Alkaline AA cells in the same holder start at about 6 V, which is the top of the servo’s range. NiMH cells stay lower and steadier, and can be recharged between nights.
Pro tip Put the battery pack in a pocket or on a belt and run a thin cable up to the mask. 100+ grams hanging on the back of a mask pulls it off the face and makes it tiring to wear.
Why we like it
- ✓4 × 1.2 V = 4.8 V, inside the MG90S's 4.8–6 V range
- ✓2000 mAh minimum capacity per cell, Panasonic says
- ✓Up to 2100 recharge cycles, Panasonic says
- ✓Pre-charged — usable out of the pack
Keep in mind
- !Charger not included in this pack
- !4 AA cells weigh about 108 g — noticeable if mounted on the mask itself
- Chemistry
- NiMH
- Voltage
- 1.2 V per cell
- Capacity
- 2000 mAh (min)
- Cycles
- Up to 2100
- Weight
- 27 g per cell
- Model
- BK-3MCCA4BA
DAIERTEK 4 × AA Battery Holder with Switch and Cover
A closed 4 × AA box with a switch, to carry in a pocket.
A loose battery holder with exposed cells is fine on a bench but not in a costume, where cells get knocked out and wires get pulled. A closed box with a screw-on lid and a switch solves both, and the switch lets you turn the mask off between photos without unplugging anything.
The leads are long enough to reach a connector on the costume but not long enough to reach up to the head; plan on an extension cable.
Pro tip Put a polarized plug (such as a JST or a servo-style connector) on the leads so the pack can’t be connected backwards, and add a small fuse or polyfuse in the red wire.
Why we like it
- ✓Built-in ON/OFF switch on the back
- ✓Screw-down cover keeps cells from falling out
- ✓Wire leads about 150 mm (5.9 in) long, tinned ends
- ✓68.7 × 64.2 × 22.5 mm — fits a pocket
Keep in mind
- !Bare wire ends — you'll have to solder or crimp a connector on
- !Labeled 6 V for alkaline cells; with NiMH it gives 4.8 V (which is what you want for servos)
- Cells
- 4 × AA
- Size
- 68.7 × 64.2 × 22.5 mm
- Leads
- ~150 mm, tinned
- Switch
- ON/OFF
- Cover
- Screw-fastened