Make a Magnetic-Coupled Wooden Train Set
A hard maple locomotive and cars with turned wheels and screwed-in magnetic couplers, finished food-safe — the seven steps and the tools for each one.
Published October 13, 2026 · 7 picks
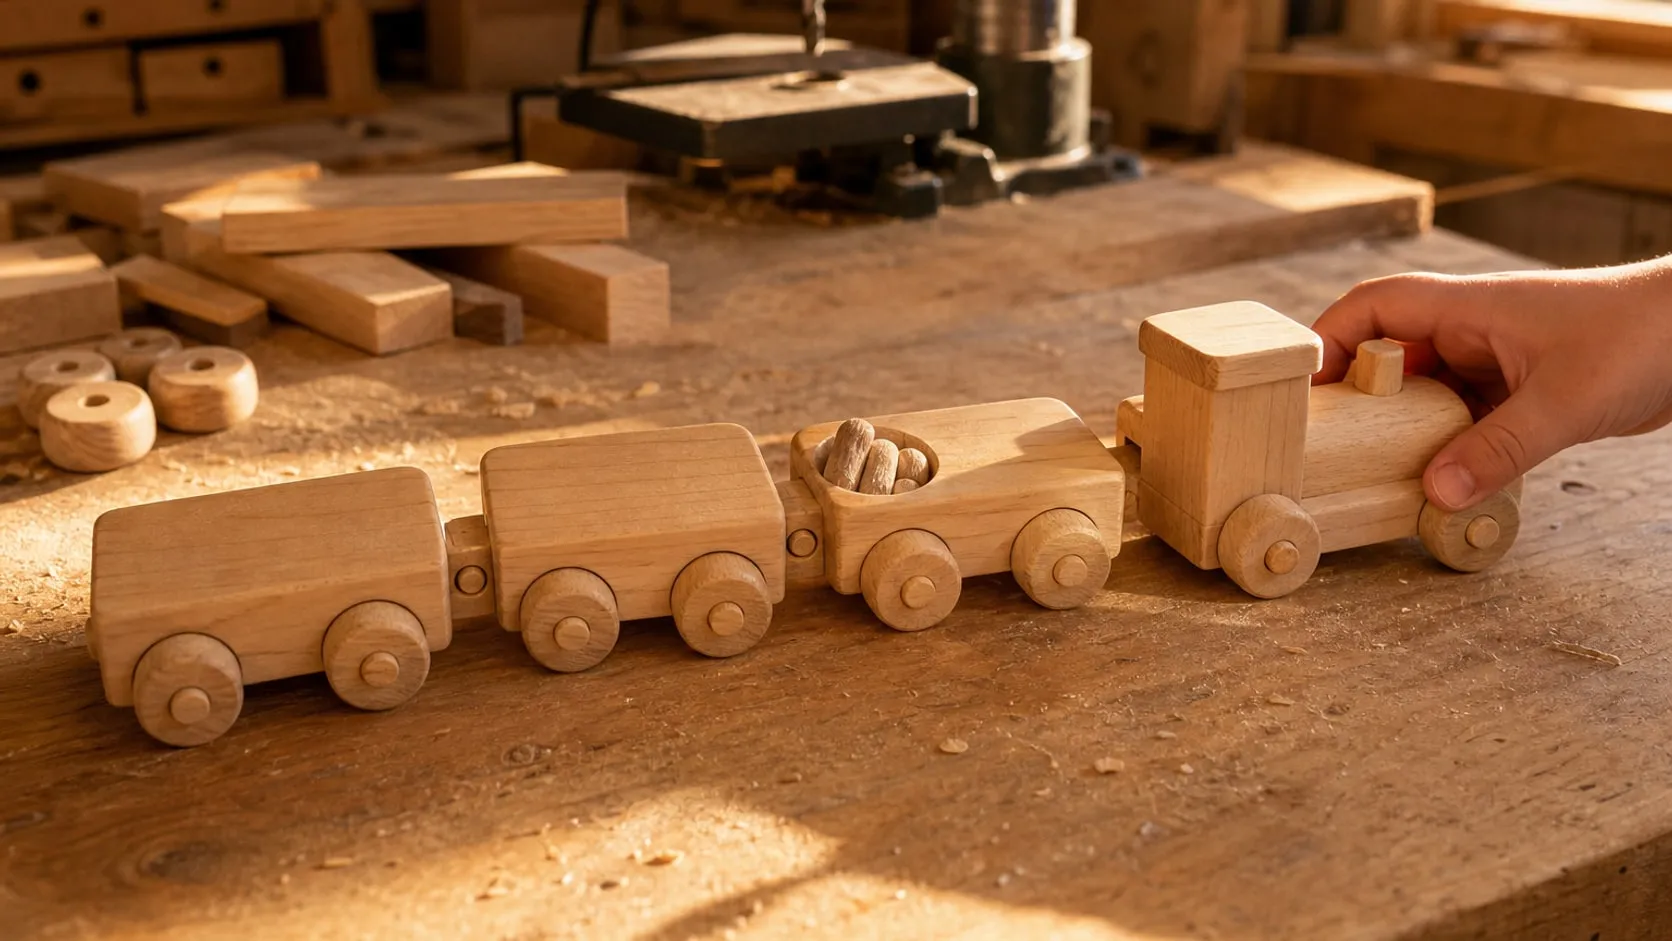
A wooden train is one of the few toys that gets handed down, and one you make yourself can carry a name, a date or a car in every kid’s favorite color. The build is simple: blocks of maple, turned wheels, and magnets that let small hands connect the cars without fiddly hooks. What makes it a good toy rather than a craft project is the detail work: straight axle holes, rounded edges, and couplers that can never come loose. Here’s the whole process, with the tools for each step below.
Safety first. Neodymium magnets are a serious hazard if swallowed; two of them can pinch the intestines together. In this build every magnet sits in a recess and is held by a screw, and small parts are glued. A homemade toy isn’t safety-tested like a store-bought one, so check it before every gift, and take a car out of play the moment a wheel or magnet feels loose. For children under 3, consider skipping the chimney and other small add-on parts.
Step 1: Plan the train and cut the cars
Start with a simple set: a locomotive and three cars. Everything is cut from 3/4 x 2 in hard maple.
- Locomotive base: 5 in long. Cab: a 2 in piece of the same board stood on end. Chimney: a 3/4 in cube from an offcut.
- Cars: 3-1/2 to 4 in long each. Make one plain flatcar, one with a cargo pocket, and one tender behind the locomotive.
- Cut square. A miter saw or a fine handsaw in a miter box does it. Set a stop block so every car is the same length; square ends are what make the couplers line up.
- Mark the axle line on both sides of each car: 3/4 in in from each end, 3/8 in up from the bottom (half the height). With 1-1/2 in wheels, that leaves the car riding about 3/8 in above the floor.
Step 2: Glue up the locomotive
Glue the cab to the top of the base at the back end, flush with the rear and the sides, and the chimney about 1 in from the front. Use a thin bead of glue, press the parts together and clamp them for an hour. Wipe off squeeze-out with a damp rag right away; dried glue on maple stays light-colored under the finish.
Leave the locomotive overnight before drilling it. The glue needs a full day to reach its strength, and drilling puts a lot of force on a fresh joint.
Step 3: Drill the axle holes
Straight axle holes are the difference between a car that rolls and one that crabs to the side.
- Make a test hole first. Drill a hole in a maple offcut and push in one axle peg. It should go in snug with light pressure. Adjust the bit size until it does, and note it.
- Set up a fence. Clamp a straight board to the drill press table so the bit lands on the axle line, 3/8 in up from the bottom of a car standing on its side.
- Set the depth stop to about 5/8 in, less than half the width of the car, so the holes from both sides don’t meet.
- Drill all four holes on every car with the car pressed against the fence. Wear safety glasses, and keep fingers well clear; clamp short pieces rather than holding them.
Step 4: Bore the coupler recesses and the cargo pocket
The couplers sit in shallow recesses in the ends of the cars, centered left to right and 3/8 in up from the bottom so every car meets the next at the same height.
- Decide on the coupler layout first. Stack two magnets countersunk face to countersunk face. If they attract, you can put a magnet at both ends of every car, with the poles arranged so the front of one car always meets the back of the next. If they repel, use the simpler layout: a magnet at the back of every car and a steel washer at the front. It always connects front to back, and pole direction never matters.
- Bore the recesses with a 1/2 in Forstner bit for the 0.47 in (12 mm) magnets, about 1/8 in deep, so the magnet sits flush or a hair below the surface. Bore the washer recess to match your washer. Clamp the car upright in a hand screw or against a fence; the end of a small car is a tight spot to drill.
- Drill a pilot hole in the center of each recess for the screw.
- The cargo pocket: bore a 1-1/2 in pocket in the top of one car, centered between the axles and no deeper than 3/8 in, so it stays clear of the axle holes. Fill it later with wooden pegs, beads or little dowel “logs.”
Leave the locomotive’s front without a coupler, and the last car’s back too if you like; a magnet at the end of the train only collects screws and paper clips.
Step 5: Round the edges and sand
Sharp edges are the difference between a toy and a block of wood. Round every edge and corner, with a small round-over bit in a router table if you have one, or by hand with 80-grit sandpaper wrapped around a block. Rounded corners look friendlier, don’t chip, and don’t hurt when a car is thrown at a sibling.
Then sand every surface through 120, 150 and 220 grit. Pay attention to the ends: saw marks in end grain stay visible under oil. Wipe the cars with a damp cloth to raise the grain, let them dry, and give them one more light pass with 220. Wear a dust mask; fine maple dust shouldn’t be breathed in.
Step 6: Finish with a food-safe oil
Kids chew toys, so the finish should be one sold as safe for food contact. Push a toothpick into every axle hole and pilot hole, so the oil stays out of the places glue and screws need to grip. Wipe a coat of oil over every surface, let it soak in for 15–20 minutes, and wipe off the rest. Add two or three more thin coats a day apart.
Let the cars cure for the time the finish maker gives (5–7 days for the oil below) before they go to a child. Lay oily rags flat outside to dry before throwing them away.
Step 7: Fit the wheels and couplers
- Wheels. Put a little glue into each axle hole, not on the peg. Slide a wheel onto a peg and tap the peg into the hole, stopping with a gap about the thickness of a business card between the wheel and the car. Spin each wheel; it should turn freely without wobbling. Wipe off any glue at once, or the wheel will be glued solid.
- Magnets. Set each magnet in its recess, countersunk face out, and drive a small flat-head wood screw through it until the head sits flush in the countersink. Don’t overtighten; neodymium magnets are brittle and can crack.
- Washers. Screw a flat steel washer into each front recess the same way.
- Test the whole train. Every car should connect to every other car front to back, roll straight, and pull apart with a firm tug. Pull hard on each wheel and coupler; nothing should move.
Leave the glue a full day before the train is played with.
What it costs in time: an evening for cutting and gluing, an evening for drilling and sanding, about a week of short finishing sessions and curing, and an hour for wheels and couplers. Start at least two weeks before the holiday. The tools for each step are below.
At a glance
7 picksAs an Amazon Associate I earn from qualifying purchases. If you buy through a link on this page we may earn a small commission, at no extra cost to you. How this works.
Barrington Hardwoods Maple Boards, 3/4 x 2 x 12 in, 4-Pack
Kiln-dried hard maple already milled to the width and height of a train car.
A toy train needs a wood that is hard, smooth and splinter-resistant, and hard maple is what most commercial wooden toys are made from. These boards come already surfaced to 3/4 x 2 in, which happens to be a good cross-section for a small train car: two inches wide, three-quarters tall, cut to length with a handsaw or miter saw.
Four boards give enough for a locomotive, three or four cars and some offcuts for the cab and chimney. If you plan a longer train or a set for two kids, the same boards come in lengths up to 48 in.
Pro tip Cut every car from one board in one session, with a stop block on the saw. Cars of exactly the same length and square ends line up neatly, and the couplers on every car end up at the same height.
Why we like it
- ✓Select white hard maple, the classic wood for toys that get chewed and dropped
- ✓Kiln dried, which Barrington says reduces warping and cracking
- ✓Already 3/4 x 2 in, so a train car is just a crosscut away
- ✓Light, even color that takes a clear oil finish well
Keep in mind
- !Four 12 in pieces make one small train; a bigger set needs the longer variants
- !Hard maple burns easily with a dull bit or saw blade
- !Pale wood shows dirt and fingerprints over time
- Wood
- Select white hard maple, kiln dried
- Size
- 3/4 x 2 x 12 in (19 x 51 x 305 mm)
- Pack
- 4 boards
- Other lengths
- 18, 24, 36 and 48 in
Titebond III Ultimate Wood Glue, 8 oz
A waterproof glue for the cab, the chimney and the axle pegs.
A wooden train gets pulled, dropped, chewed and wiped, so its joints need a glue that is stronger than the wood and doesn’t let go when it gets wet. Titebond III is the waterproof member of the Titebond family and is a common choice for cutting boards and other wood that meets water.
In this build it holds the cab and chimney on the locomotive and the axle pegs in their holes. The tan color is a little darker than maple, so use a thin bead and wipe any squeeze-out with a damp rag right away.
Pro tip Put glue in the hole, not on the peg. A peg dipped in glue pushes it all out at the shoulder, right where the wheel spins, and glues the wheel solid.
Why we like it
- ✓Waterproof once cured, per Titebond, so a toy that gets wiped down stays together
- ✓About an hour of clamp time for most joints
- ✓Cleans up with water while it's wet
- ✓8 oz is plenty for a whole train and several more projects
Keep in mind
- !Tan color shows in a light maple glue line if you wipe it sloppily
- !Needs a full day to cure before the joint takes real stress
- !Has a shelf life — Titebond lists 24 months closed, stored below 75 °F
- Type
- Wood glue, waterproof
- Volume
- 8 fl oz (237 ml)
- Clamp time
- About 1 hour
- Full cure
- 24 hours
- Color
- Tan
- Model
- 1413
WEN 4206T 8 in 5-Speed Benchtop Drill Press
Square, same-depth axle holes, so every car rolls straight.
The part of a toy train that’s hardest to do well by hand is the axle hole. If one hole leans a few degrees, that wheel rubs the body or the car rolls in a curve. A drill press drills every hole at exactly 90 degrees and to the same depth with the depth stop, which is why it’s the tool that makes a homemade train look store-bought.
The WEN is a small benchtop model that covers this kind of work: axle holes in the side of a car, shallow pockets for magnets and cargo with Forstner bits, and holes for a chimney or smokestack. It isn’t built for deep holes in big stock, but toy parts are short and light.
Pro tip Clamp a straight board to the table as a fence, at the distance of the axle line from the bottom of the car. Every car then gets its holes in the same place without measuring again.
Why we like it
- ✓Holes come out square to the face, so the wheels on a car sit level
- ✓Five speeds from 750 to 3,200 RPM; the slow end suits large Forstner bits
- ✓1/2 in keyed chuck takes the full range of Forstner bits
- ✓Small enough to live on a shelf at 23 in tall
Keep in mind
- !2 in of spindle travel limits deep holes in one pass
- !Speeds change by moving a belt, not a dial
- !The 6.5 in table is small; a scrap plywood table and fence help a lot
- Motor
- 2.3 A induction, 120 V
- Swing
- 8 in
- Spindle travel
- 2 in
- Speeds
- 750, 1,100, 1,500, 2,100, 3,200 RPM
- Chuck
- 1/2 in keyed
- Table
- 6.5 x 6.5 in, bevels 45° left and right
- Height
- 23 in
- Weight
- 32 lb
IRWIN Marples Forstner Bit Set, 14 Pieces
Flat-bottomed pockets for the magnets, washers and cargo.
A Forstner bit cuts a hole with a flat bottom and crisp sides instead of a cone, which is what you want for anything that should sit in a recess: a disc magnet, a steel washer, a round “load” in a cargo car. Twist bits and spade bits leave a point or a rough bottom that a magnet would rock on.
For a train, the small sizes recess the couplers flush with the car’s end, and the larger ones bore shallow pockets in the top of a car for pegs, beads or little logs to ride in. The 1/2 in bit matches the medium magnets in this build.
Pro tip Run large Forstner bits at a low speed, around the slowest setting of a small drill press, and lift the bit out every few seconds to clear chips. Maple scorches quickly when the bit spins too fast or packs with chips.
Why we like it
- ✓Flat-bottomed holes, so a magnet or washer sits flat and flush
- ✓Sizes from about 1/4 in to 2 in in one case
- ✓Reduced shank on the large bits fits a 3/8 in chuck
- ✓Clean edges in hard maple with little tear-out
Keep in mind
- !Carbon steel dulls faster than carbide in a lot of hardwood
- !Large bits are best used in a drill press, not handheld
- !The listing doesn't spell out every size in the set
- Pieces
- 14
- Range
- About 1/4 in (6.35 mm) to 2 in (50.8 mm)
- Material
- Carbon steel
- Shank
- Straight; reduced on 1-1/2, 1-5/8 and 2 in bits
- Model
- 1966893
TotalBoat Wood Honey Food Safe Finish, 8 oz
A solvent-free wipe-on oil for a toy that will end up in a mouth.
A toy for a small child will be chewed, so paint and varnish of unknown makeup are a poor choice. A penetrating oil sold as food-safe is the simple answer: it soaks into the maple, brings out the grain a little, and leaves no film that can chip off into a mouth.
Wood Honey is made by TotalBoat, the same company as the epoxy in our charcuterie board guide, and it’s applied the way most board oils are: wipe it on, let it soak, wipe off the rest. Several thin coats build a soft satin sheen.
Pro tip Finish the cars before you fit wheels and magnets, and push a toothpick into every axle hole and pilot hole first. Glue and screws hold far better in clean wood than in wood soaked with oil.
Why we like it
- ✓Solvent-free with no VOCs, per TotalBoat, and a mild smell
- ✓TotalBoat says the cured finish is food-safe under FDA 21 CFR 175.300
- ✓Wipe on, wait, wipe off; no brush marks or drips
- ✓Satin look that leaves maple looking like wood, not plastic
Keep in mind
- !Needs 5–7 days after the last coat before the surface is ready for full use
- !An oil finish, not a hard film; a well-played toy needs a fresh coat now and then
- !Oil in an axle hole weakens the glue joint, so the holes need protecting
- Volume
- 8 fl oz
- Type
- Penetrating wood oil and conditioner
- Sheen
- Satin
- Solvents / VOCs
- None, per TotalBoat
- Food contact
- FDA 21 CFR 175.300 once cured, per TotalBoat
- Model
- 520937
Maple Landmark 1.5 in Wood Wheels with Axle Pegs, 100 Pack
Turned 1-1/2 in wheels, each with its own matching axle peg.
Wheels are the one part of a wooden train that’s hard to make well at home. A wheel cut with a hole saw is rarely perfectly round or centered, and the car wobbles as it rolls. Turned wheels with a centered hole and a matching peg solve that, and leave the fun part, the shape of the train, to you.
At 1-1/2 in, these wheels stand a bit lower than the bottom of a 3/4 in tall car when the axle sits at mid-height, so the car rides on the wheels, not on its belly. Pegs press into the side of the car and are glued there; the wheel spins on the peg’s shank.
Pro tip Drill one test hole in a scrap of the same maple and push a peg in. It should go in snug with light pressure. Too tight and the wood can split near the end of the car; too loose and only the glue holds it.
Why we like it
- ✓Every wheel comes with its own matching axle peg
- ✓Made in the USA by Maple Landmark, a Vermont toy maker
- ✓1-1/2 in diameter and 1/2 in thick suits a car made from 3/4 x 2 in stock
- ✓Enough for a big train, or a few trains to give away
Keep in mind
- !100 is far more than one train needs
- !Peg and hole size aren't listed, so you test-drill before the real holes
- !Raw wood; sand any rough edge before finishing
- Diameter
- 1-1/2 in (38 mm)
- Thickness
- 1/2 in (13 mm)
- Pack
- 100 wheels + 100 axle pegs
- Material
- Solid wood
- Model
- 91043
- Other sizes
- 3/4, 1, 1-1/4 and 2 in
DIYMAG Countersunk Neodymium Magnets, 3 Sizes, 45 Pack
Countersunk magnets that are screwed in, not just glued.
Store-bought wooden trains connect with magnets because they’re forgiving: a toddler only has to bring two cars close and they click together, and they pull apart without breaking anything. Countersunk magnets are the safer way to copy that at home, because a screw through the middle holds the magnet in its recess even if glue fails.
The medium 0.47 in (12 mm) size fits a 1/2 in Forstner hole with a little clearance and holds a train of small maple cars together. The small ones are handy for a lighter coupler or a magnetic load, the large ones for a pull handle.
Pro tip Before you screw anything in, stack two magnets countersink-face to countersink-face. If they push apart, every car needs a magnet at one end and a steel washer at the other, as described in the guide. If they snap together, check a few more, because the pole of the countersunk face can vary within a pack.
Why we like it
- ✓Countersunk hole lets a flat-head screw hold each magnet mechanically
- ✓Three sizes in one pack — 0.32, 0.47 and 0.59 in across
- ✓Only 0.12 in (3 mm) thick, so a shallow recess hides it flush
- ✓Nickel-copper-nickel coating against corrosion
Keep in mind
- !Screws don't appear to be included; buy small flat-head wood screws to match
- !The countersunk face is always the exposed face, which makes pole direction a puzzle
- !Neodymium magnets are a serious hazard if swallowed — they must never come loose in a toy
- Sizes
- 0.32 x 0.12 in (hole 0.12 in), 0.47 x 0.12 in (hole 0.16 in), 0.59 x 0.12 in (hole 0.16 in)
- Material
- Neodymium (NdFeB), Ni-Cu-Ni plated
- Pack
- 45 magnets
- Model
- XCK45