Carve an Heirloom Wooden Pull Toy Car
A basswood block, a coping saw and three knives become a hand-carved pull car with treaded wheels and a food-safe finish. A weekend build, step by step.
Published October 13, 2026 · 7 picks
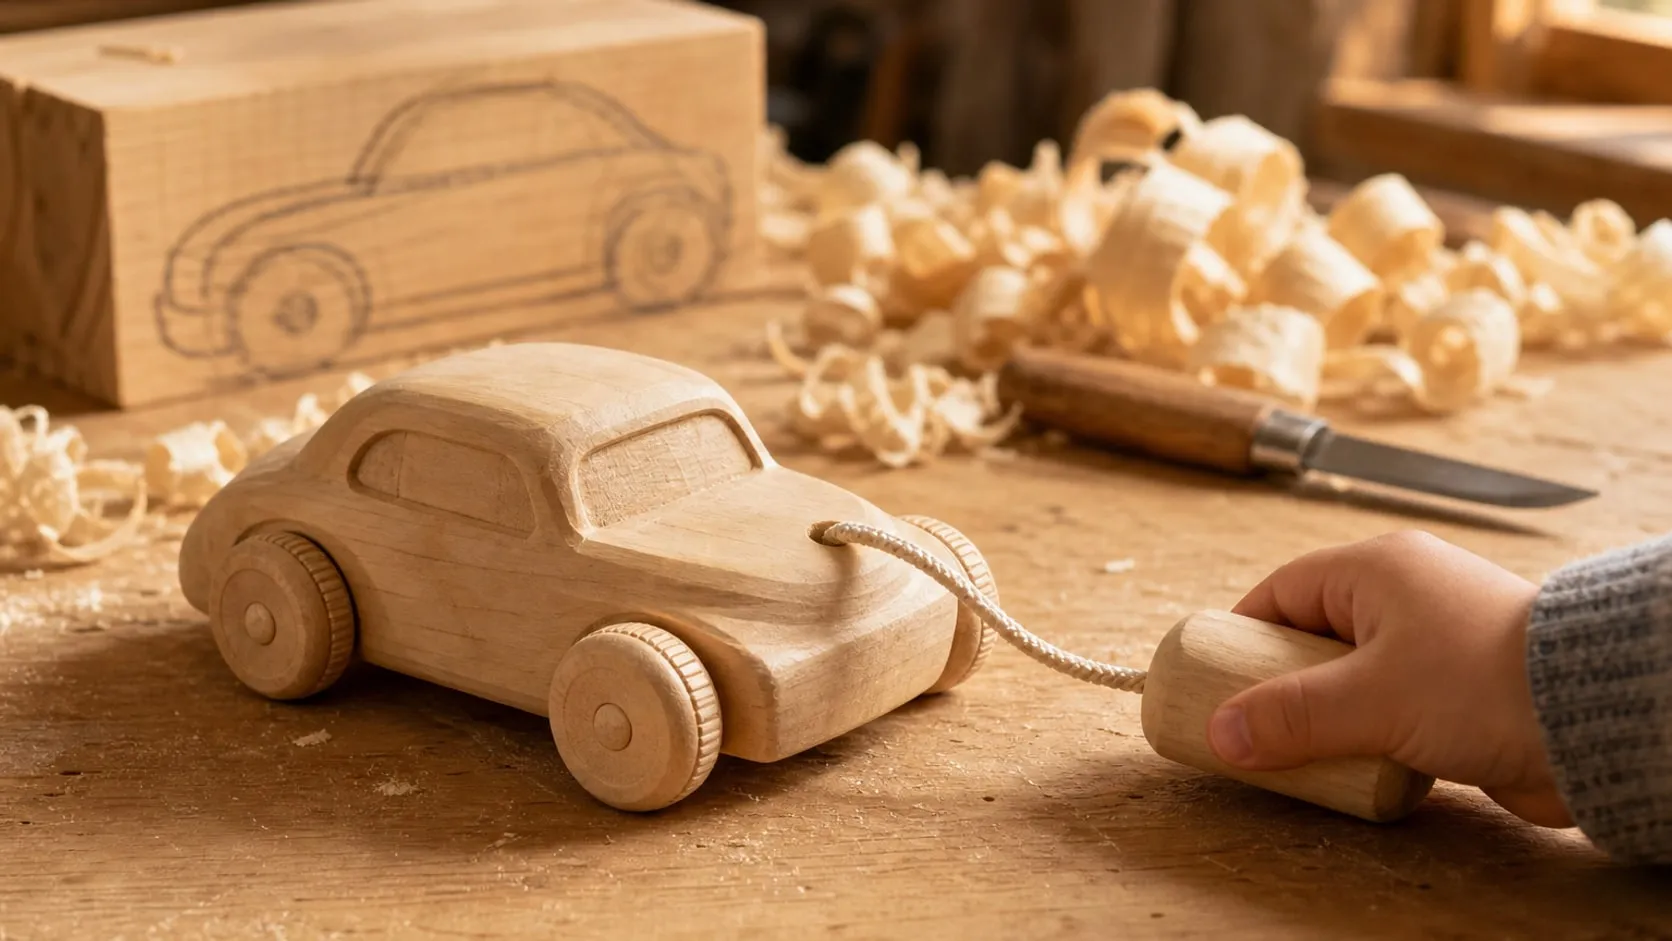
Short videos of a square block turning into a little wooden car have made carving look easy, and it’s closer to easy than most people think. A pull car is a good first carving project: it’s small, the shape is simple, and the details are up to you. Carved from one block, with a name and a year on the bottom, it’s the kind of toy that gets kept long after it stops being played with. Here’s the whole process, with the tools for each step below.
Safety first. A homemade toy isn’t safety-tested like a store-bought one. For children under 3, anything that fits through a toilet-paper tube is a choking hazard, so every peg must be glued in and the pull handle must be big. US toy rules (ASTM F963) keep cords on toys for children under 18 months shorter than 12 in (30 cm), so use a short cord for babies and toddlers. Check the car before you give it, and take it out of play the moment a wheel feels loose.
Step 1: Draw and cut the profile
Start with a 6 x 2 x 2 in basswood block. Look at the end grain and choose the cleanest side as the side of the car.
- Draw the side profile on that face: a low hood at the front, about 1-1/4 in tall; a rounded cabin roof rising to the full 2 in in the middle; and a sloping back that ends about 1-1/2 in tall. A soft, rounded shape carves faster and is nicer in small hands than a detailed one.
- Clamp the block in a vise with the line above the jaws.
- Cut about 1/16 in outside the line with the coping saw, keeping the blade as square to the face as you can. Take your time; 2 in of wood is a lot for a hand saw. A scroll saw or band saw does this step in a minute if you have one.
Keep the offcut from the top of the hood. It’s the right size for the pull handle later.
Step 2: Drill the axle holes while the block is still square
Flat, square sides are much easier to drill straight, so drill before you carve anything.
- Mark the axle centers on both sides: 1-1/4 in in from each end and 1/2 in up from the bottom. With 1-1/2 in wheels, that leaves the car riding about 1/4 in off the floor.
- Test the fit first. Drill a 7/32 in hole in a scrap of basswood and push in one axle peg. It should go in snug with light pressure.
- Drill each hole 3/4 in deep. Wrap a flag of tape around the bit as a depth stop. A drill press keeps the holes square; with a hand drill, stand a small square next to the bit and check it from two directions. Holes from the two sides must not meet in the middle.
- Drill the cord hole: a 3/16 in hole straight down through the hood, about 3/4 in back from the front.
Put the car on a flat surface with four pegs and wheels pushed in dry. If it rocks, now is the time to fix a hole.
Step 3: Carve the shape
Basswood carves easily, but a sharp knife still needs rules. Wear a cut-resistant glove on the hand holding the car, keep your thumb behind the blade, and carve sitting down with the work in front of you, never on your lap.
- Rough out with the roughing knife. Take off the saw marks and round over the long corners of the body. Carve with the grain, from high to low; if the knife starts to dig in and tear, turn the car around and cut from the other direction.
- Shape the body with the cutting knife. Round the hood down to the front bumper, roll the roof into the sides, and slope the back. Turn the car often, so it looks right from the top and the front as well as the side.
- Add details with the detail knife. Outline the side windows with shallow stop cuts, then slice in at an angle toward each line to lower the window area by about 1/16 in. Two small cuts at the front can suggest headlights. Keep details shallow; deep cuts make thin, fragile edges.
- Leave the area around the axle holes flat, a circle about the size of a wheel, so the wheels spin against a flat surface.
- Sign it. Carve or burn initials and the year into the bottom of the car. It’s what turns a toy into an heirloom.
Strop the knife every half hour or so. A dull knife needs force, and force is what makes knives slip.
Step 4: Sand and round every edge
Carving facets look great to adults; toddlers just need no sharp edges. Sand the whole car with 120 grit, paying attention to the corners and the edges of the window cuts, then 180 and 220 grit. Leave the carved facets on the body if you like the look, but make sure every edge is soft to the touch.
Wipe the car with a damp cloth to raise the grain, let it dry and give it a final light pass with 220. Wear a dust mask while sanding.
Step 5: Finish with oil and wax
Push a toothpick into each axle hole and the cord hole, so the finish stays out of the places glue needs to grip. Rub a coat of the mineral oil and beeswax gel over the car and the wheels, let it soak in for about 20 minutes, then buff hard with a clean cloth until the surface feels dry. Give it a second coat the next morning for a deeper sheen.
Oil and wax don’t need to cure, but the finish wears with play. Re-coat the car whenever it starts looking dry.
Step 6: Fit the wheels and the pull cord
- Wheels. Put a small drop of glue into each axle hole, not on the peg. Slide a wheel onto a peg and tap the peg in, stopping with a gap about the thickness of a business card between the wheel and the car. Spin each wheel; it should turn freely. Wipe away any glue at once.
- Cord. Thread a soft cotton cord down through the hole in the hood, tie a large knot under the car, and add a drop of glue to the knot. Keep the cord under 12 in for a child under 18 months.
- Handle. Carve the hood offcut into a smooth round handle, much bigger than a toilet-paper tube is wide, drill it, and tie it to the other end of the cord. A small bead is not a safe handle.
- Test it. Let the glue dry overnight, then pull hard on every wheel and on the cord. Nothing should move.
What it costs in time: Saturday morning for cutting and drilling, Saturday afternoon for carving, and a few short sessions on Sunday for sanding, finishing and wheels. The tools for each step are below.
At a glance
7 picksAs an Amazon Associate I earn from qualifying purchases. If you buy through a link on this page we may earn a small commission, at no extra cost to you. How this works.
Thiecoc Basswood Carving Blocks, 6 x 2 x 2 in, 6 Pack
Soft, even basswood blocks already the size of a toy car body.
Carvers use basswood for a reason: it’s soft enough to carve with a knife alone, has almost no visible grain to fight, and doesn’t split when you take a thin shaving across it. For a first carved toy, that’s the difference between a weekend project and a frustrating one.
A 6 x 2 x 2 in block happens to be a good size for a pull car: long enough for a hood, a cabin and a rounded back, and wide enough that the axle pegs can go in from both sides without meeting in the middle. The trade-off is hardness. A basswood car shows dents sooner than one made from maple, which some parents see as character and some don’t.
Pro tip Look at the end of the block before you draw the car. Put the side with the straightest, most even grain lines facing out, so the axle holes and the profile cut don’t run into a knot or a wild patch of grain.
Why we like it
- ✓6 x 2 x 2 in is a ready-made car body; no milling or gluing up thicker stock
- ✓Basswood is soft and even-grained, so a knife cuts it cleanly in every direction
- ✓Six blocks leave room for a practice car before the one you give away
- ✓Pale, plain wood takes an oil finish or paint equally well
Keep in mind
- !Basswood is soft and dents more easily than maple or beech in rough play
- !The ends are rough-sawn and need squaring or sanding
- !A 2 in thick block is slow work for a hand saw
- Size
- 6 x 2 x 2 in (152 x 51 x 51 mm)
- Pack
- 6 blocks
- Wood
- Basswood
- Model
- TH-UP10
- Other packs
- 1 x 1 x 6, 1.4 x 1.4 x 6, 2 x 2 x 4 in
IRWIN ProTouch Coping Saw (2014400)
A deep-frame hand saw for the curves of the hood, roof and back.
A coping saw is the simplest tool that can cut a curve. The blade is held under tension in a steel frame, so it’s thin enough to turn a corner while you cut, and the deep frame lets it reach well into a piece. For a toy car, that’s all you need to cut the side profile, the low hood, the rounded roof and the sloping back, out of a square block.
It’s not fast in 2 in basswood. If you already own a scroll saw or band saw, use it for this step. If you don’t, a coping saw and a block clamped in a vise will get there in ten to fifteen minutes, and the carving that follows cleans up the saw marks anyway.
Pro tip Cut about 1/16 in outside the line, not on it. A thin blade in thick wood tends to wander off square, and the extra wood gives the knife something to clean up.
Why we like it
- ✓5-1/2 in frame depth reaches across a 6 in long toy block
- ✓Thin blade follows tight curves like a hood, roof and rounded back
- ✓Cushioned ProTouch handle for a long cut
- ✓Quiet and dust-light enough to use at a kitchen table with a clamp
Keep in mind
- !Slow going in 2 in thick wood compared with a scroll saw or band saw
- !The thin blade can drift out of square in thick stock, so leave a margin
- !Blades snap if twisted; keep a few spares
- Frame depth
- 5-1/2 in (140 mm)
- Blade length
- 6-1/2 in (165 mm)
- Blade
- High-speed steel
- Frame
- Flat-bar steel
- Weight
- 8 oz
- Model
- 2014400
Flexcut Carving Knife Starter Set KN500
Roughing, cutting and detail knives for the whole car, block to windows.
Most of a carved toy car is done with one or two knives: a stout blade to take off big chips and round the body, and a pointed one for the window outlines and the details that make it look like a car rather than a rounded block. This set from Flexcut covers both, plus a mid-sized cutting knife in between.
Flexcut is an established carving-tool maker, and the blades are 1095 high-carbon steel, a common choice for carving knives because it takes a keen edge and is easy to bring back with a strop. That also means it can rust; it’s not stainless.
Pro tip Strop the knife every 20–30 minutes of carving, a few pulls on each side on leather with polishing compound. A sharp knife needs less force, and less force is what keeps a slip from turning into a cut.
Why we like it
- ✓Roughing, cutting and detail knife cover a whole toy from block to finished shape
- ✓1095 high-carbon steel blades, which take a very fine edge and are easy to resharpen
- ✓Shaped ash handles fill the hand for long carving sessions
- ✓Made in Erie, Pennsylvania, with a limited lifetime warranty, per Flexcut
Keep in mind
- !Carbon steel rusts if it's put away wet or sweaty; wipe and oil the blades
- !The edge needs regular stropping to stay sharp
- !Fixed blades need a safe place to live; there's no folding or locking option
- Knives
- Roughing knife, cutting knife, detail knife
- Blade steel
- 1095 high-carbon steel
- Handles
- Ash wood
- Model
- KN500
- Made in
- USA (Erie, PA)
NoCry Cut Resistant Gloves (CutGuard)
A cut-resistant glove for the hand that holds the wood.
Carving cuts usually happen to the hand holding the wood, not the one holding the knife. A cut-resistant glove on that hand turns many of the small slips every beginner makes into a scuffed glove instead of a cut thumb. NoCry sells this one mainly for kitchen work, but a thin knit glove with a Level 5 cut rating is exactly what many carvers wear.
It has limits. The knit stops a slicing edge much better than a point, so a knife tip driven straight in can still get through. Treat it as a backup for good habits, not a replacement for them.
Pro tip Wear the glove on the holding hand, and add a leather or rubber thumb guard for paring cuts toward your thumb. Keep the knife hand bare for a better grip on the handle.
Why we like it
- ✓Rated EN388:2016 cut Level 5, per NoCry
- ✓Thin, stretchy knit keeps enough feel to hold a small block securely
- ✓Ambidextrous, so either glove fits the holding hand
- ✓Machine washable
Keep in mind
- !Cut-resistant is not stab-proof; a knife point can still push through the knit
- !Gives a false sense of safety if it replaces good knife technique
- !Fit matters; order your size, as a loose glove can bunch around the wood
- Cut rating
- EN388:2016 Level 5, per NoCry
- Material
- HPPE, glass fiber, nylon, polyester, spandex knit
- Fit
- Ambidextrous
- Care
- Machine wash
- Pack
- 1 pair
- Model
- CutGuard
Rowdy Rooster Cutting Board Gel, Mineral Oil and Beeswax, 8 oz
Mineral oil and beeswax, the classic finish for a toy that gets chewed.
Mineral oil and beeswax is the traditional finish for wooden toys and kitchen boards. The oil soaks into the wood and brings out the grain, and the wax stays near the surface and gives a soft sheen. Neither forms a hard film that could chip off, and neither has to cure, so a toy can be wrapped the day it’s finished.
This one comes as a gel, which is handy on a carved shape: it stays where you rub it instead of pooling in the window cuts. The trade-off is durability. An oil and wax finish wears thin with play, so a favorite toy will want a fresh coat every so often.
Pro tip Rub the gel in, wait 20 minutes, then buff hard with a clean cloth until the surface feels dry, not greasy. A soft toothbrush works the wax out of the carved window lines.
Why we like it
- ✓Food-grade mineral oil and beeswax, per the maker, the classic finish for wood that goes in mouths
- ✓Gel spreads with a rag and doesn't run off carved curves the way a thin oil does
- ✓No curing time; buff it and the toy is done
- ✓Easy to refresh years later with another coat
Keep in mind
- !A soft finish that wears off with play and handling; plan to re-coat now and then
- !Light citrus scent, per the maker, which some parents may not want on a baby toy
- !Smaller maker than the big board-oil brands
- Volume
- 8 fl oz
- Ingredients
- Food-grade mineral oil, food-grade beeswax, per the maker
- Form
- Gel
- Made by
- Rowdy Rooster Woodworks
Craftparts Direct 1-1/2 in Treaded Wooden Wheels, 20 Pack
Turned birch wheels with a tread that reads as tires.
Store-bought wheels are the one shortcut worth taking on a carved car. A wheel cut at home with a hole saw is rarely perfectly round or centered, and a car on wobbly wheels never rolls well behind a toddler. These are turned birch wheels with a molded tread, so they look a bit like tires and match the hand-carved look of the body.
At 1-1/2 in across, they suit a car carved from a 2 in block: with the axle 1/2 in above the bottom of the body, the car rides about 1/4 in off the floor. The 1/4 in bore is a common size, so the wheels spin freely on the 7/32 in axle pegs listed separately.
Pro tip Sand the face and edge of each wheel lightly before finishing. Turned wheels sometimes have a fuzzy edge at the hole, and a smooth wheel looks better and is nicer in small hands.
Why we like it
- ✓Grooved tread reads as a tire, a nice detail on a carved car
- ✓Kiln-dried birch, a hardwood, per the listing
- ✓Standard 1/4 in bore fits the matching 7/32 in axle pegs with room to spin
- ✓20 wheels is enough for five cars
Keep in mind
- !Axle pegs are sold separately
- !Unfinished; needs a light sand and the same finish as the car
- !The tread grooves collect dirt over time
- Diameter
- 1-1/2 in (38 mm)
- Thickness
- 1/2 in (13 mm)
- Bore
- 1/4 in
- Wood
- Birch
- Pack
- 20 wheels
- Model
- TWT15020
Craftparts Direct Wooden Axle Pegs, 1-1/4 in, 100 Pack
Round-head pegs sized for the wheels, glued in so the wheels spin.
An axle peg does two jobs. The shank is glued into a hole in the side of the car, and the wheel spins on the part between the car and the rounded head. Because the tenon is 7/32 in and the wheel hole is 1/4 in, the wheel turns freely while the peg stays put.
On a 2 in wide car body, a 1-1/4 in peg through a 1/2 in wheel leaves about 3/4 in in the wood on each side, so the holes from the two sides don’t meet in the middle. The rest of the pack is useful for the next car, or for pegs on a coat rack.
Pro tip Put the glue in the hole, not on the peg, and use only a little. Glue on the peg gets smeared into the wheel’s hole as you push it through, and the wheel ends up glued solid.
Why we like it
- ✓Sized for wheels with a 1/4 in hole, like the treaded wheels in this build
- ✓7/32 in tenon leaves the wheel spinning freely while the peg is glued in
- ✓3/8 in rounded head keeps the wheel on with no hardware
- ✓Sanded smooth and unfinished, so they take the same finish as the car
Keep in mind
- !100 pegs is far more than one car needs
- !Needs a 7/32 in drill bit, a size not every basic bit set includes
- !Wood pegs can snap if a car is stepped on; check them before handing a toy on
- Length
- 1-1/4 in (32 mm)
- Tenon diameter
- 7/32 in (5.6 mm)
- Head diameter
- 3/8 in (9.5 mm)
- Fits
- Wheels with a 1/4 in hole
- Pack
- 100 pegs
- Model
- AP1005100