Burn a Custom Holiday Wood Sign With Pyrography
A basswood plank, a printed pattern and a wire-nib burner become a personalized holiday sign. Pattern transfer to finish, step by step.
Published October 29, 2026 · 6 picks
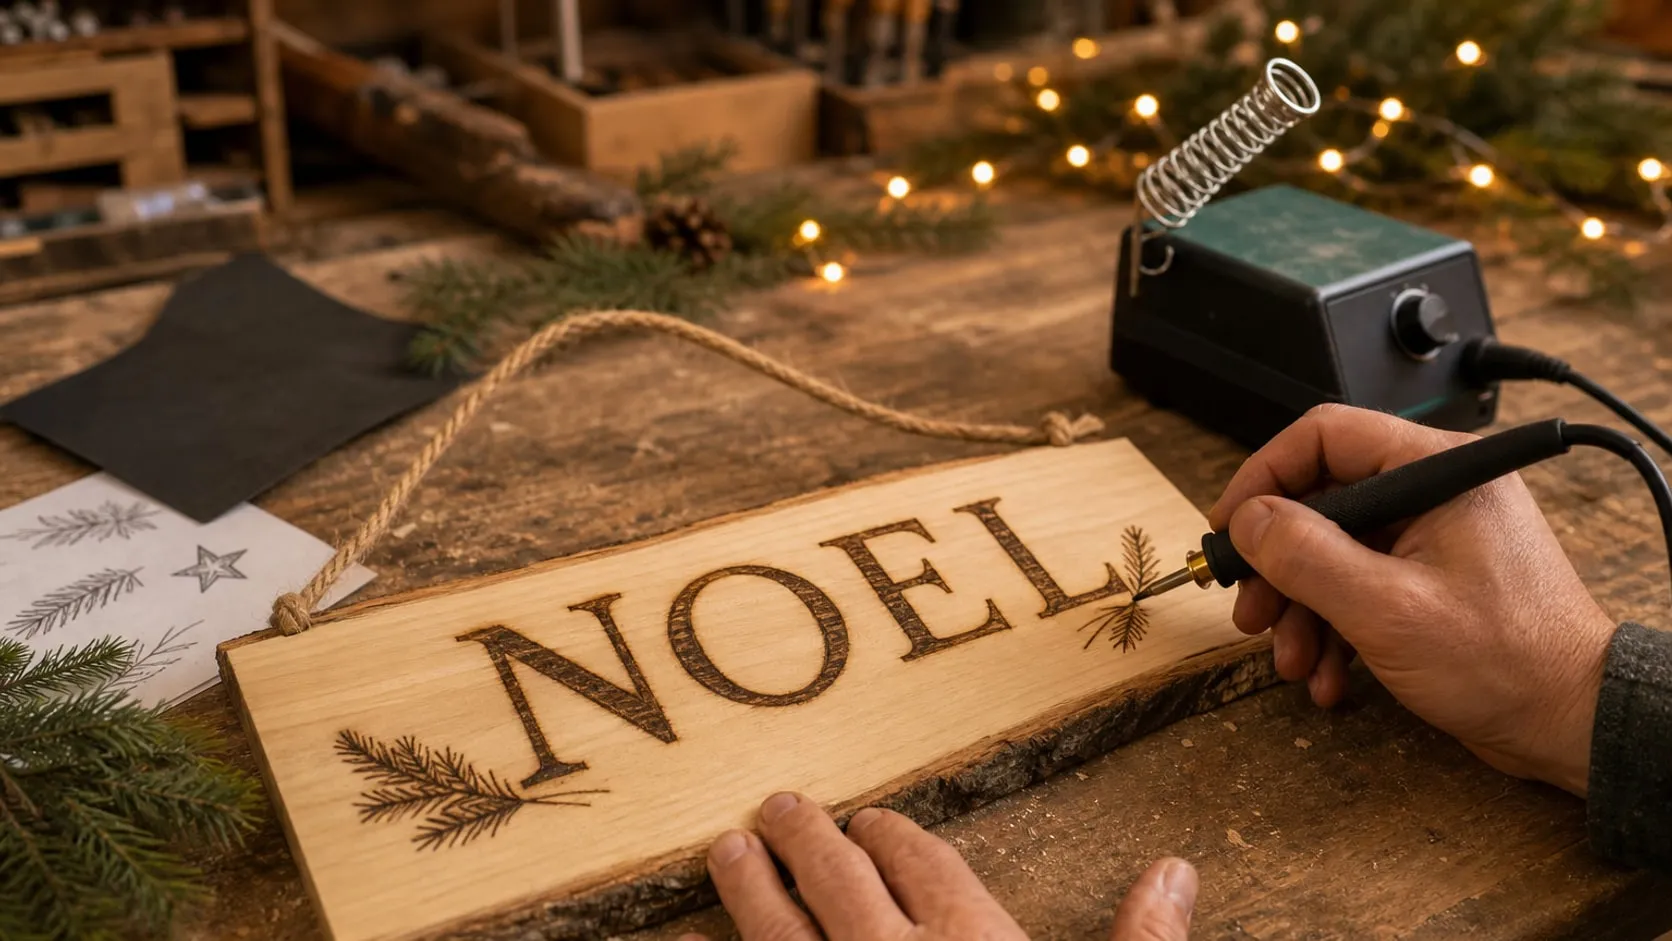
Woodburned signs are everywhere on Pinterest and TikTok this fall, and for good reason: a family name, a year and a few holiday shapes burned into a bark-edged plank look handmade in the best way, and they’re very hard to find in a store with your name on them. You don’t need to be able to draw. The lettering is designed on a computer, traced onto the wood and then burned. Here’s the whole process, with the tools for each step below.
Safety first. Woodburning makes smoke. Work in a ventilated room with a small fan pulling the smoke away from your face, not blowing it across the board. Burn only bare, natural wood: never plywood, MDF, painted or pressure-treated wood, which can release harmful fumes. The nib runs at several hundred degrees, so always park the pen in its holder, switch the station off and let the nib cool before changing it, and keep the station out of reach of kids and pets.
Step 1: Pick the board and plan the design
Lay out the blanks and choose the one with the cleanest, most even face for the gift. Keep one with a knot or a mark for practice.
- Measure the usable area. On a 14 x 6 in plank, stay about 3/4 in (2 cm) in from the bark edges and the hanger. That leaves roughly 12 x 4 in for the design.
- Design it on a computer. A text editor or a free design tool is enough. A classic layout is a large family name in the middle, a short line above it (“Merry Christmas”, “Happy Holidays”) and the year below.
- Choose bold, simple fonts. Thin hairline scripts look great on screen and are hard to burn evenly. A thick serif or a sturdy script with strokes at least 1/8 in (3 mm) wide is far more forgiving. Add a simple star, tree or snowflake rather than a detailed scene.
- Print at actual size. The design will be longer than one sheet of paper, so print it in two halves and tape them together.
Step 2: Sand the face
Sand the front of the board with the grain using the 220-grit sponge until it feels smooth to your fingertips. A smooth surface lets the nib glide; raised fibers make it skip and leave uneven lines. Wipe off the dust with a dry cloth. Go gently near the bark edges, which can flake.
Step 3: Transfer the pattern
- Position the printout on the board and check it’s straight by measuring from the top edge at both ends.
- Tape it along the top edge only, like a hinge.
- Slide a sheet of graphite paper underneath, graphite side down.
- Trace every line with a ball stylus, pressing firmly. Use a small ball for script and a larger one for bold outlines and shapes.
- Lift the hinge and check before you take the pattern off. If a letter is missing, lay it back down and trace it again.
Keep your hand off the transferred lines; graphite smudges. A sheet of paper under your palm helps.
Step 4: Set up the burner and test it
Fit a writing or skew nib for the lettering, switch the station on and give it a few seconds to heat. Now use the practice blank or the back of your sign, since it’s the same wood:
- Burn three short lines at a low, middle and higher dial setting, moving at the same steady speed.
- Pick the setting that gives a clean, dark brown line without a black, sunken groove. Too hot means wide, charred lines; too cool means you’ll be tempted to slow down, which burns dots.
- Practice one or two letters from your design.
Hold the pen like a pencil, rest your hand on the board and move your whole hand rather than just your fingers.
Step 5: Burn the outlines, then fill and shade
- Outline first. Burn every letter outline and shape at your test setting. Start moving before the nib touches the wood and keep moving as you lift off; stopping on the wood is what leaves dark blobs. Follow the grain where you can and turn the board so you’re always pulling the pen toward you.
- Fill the letters. Switch to a shader nib and fill bold letters with short, overlapping strokes in the same direction. Several light passes give a more even tone than one slow, hot pass.
- Shade at a lower setting. Turn the dial down for soft shading on shapes, or a light shadow beside each letter to make the name stand out.
- Clean the nib now and then. Carbon builds up on it and makes the burn uneven; switch the station off, let the nib cool, and rub it lightly with very fine sandpaper.
Take breaks. A wobbly line usually comes from a tired hand, not the tool.
Step 6: Clean up and finish
- Remove the leftover graphite. Rub any visible lines with a kneaded eraser, then give the face one light pass with the 220-grit sponge, with the grain. This also lifts the faint scorch haze around the letters. Brush the dust off.
- Wipe on a thin coat of tung oil with a lint-free cloth, let it soak in for about 15–20 minutes, then wipe off everything that hasn’t soaked in. Don’t scrub over the burn; light pressure keeps the soot from spreading.
- Let it dry fully before the next coat. Pure tung oil dries slowly, so give each coat at least a day, longer in a cold room. Two or three thin coats are plenty for an indoor sign.
- Dispose of rags safely. Oily rags can heat up and catch fire on their own. Lay them flat outside to dry or soak them in water in a closed metal can.
For a sign that will hang outdoors or on a front door, an exterior-rated finish is a better choice than oil alone.
What it costs in time: an evening to design, sand and transfer, two or three hours of burning for a name sign, and about a week of short sessions for the oil finish. Start at least two weeks before you want to give it. The tools for each step are below.
At a glance
6 picksAs an Amazon Associate I earn from qualifying purchases. If you buy through a link on this page we may earn a small commission, at no extra cost to you. How this works.
Cregugua Basswood Rectangle Sign Blanks, 14 in, 6 Pack
Pale basswood planks with bark edges and a jute hanger already fitted.
Basswood is the usual first choice for pyrography for the same reasons carvers like it: it’s soft, it has very little grain pattern, and it’s pale enough that a burned line stands out without much heat. A light, even burn on basswood looks like a drawing; the same burn on darker wood can disappear.
These blanks are sliced planks with the bark edge left on both long sides and a jute hanger already fitted. That rustic edge is what gives a holiday sign its look. Natural wood means natural variation, though, so pick the cleanest board for the gift and use one with a knot to practice.
Pro tip Look at the grain before you plan the layout. Long letters run more smoothly along the grain than across it, so a name along the length of the board is easier to burn evenly than one stacked vertically.
Why we like it
- ✓Basswood is pale and even, so burned lines show up dark and crisp
- ✓14 in long and about 6 in wide, room for a family name and a short line
- ✓Natural bark edges and jute rope already attached, so the sign is ready to hang
- ✓Six blanks leave room for a practice sign before the gift ones
Keep in mind
- !Sizes vary from board to board, and some have small knots or marks
- !The face is unfinished and needs a light sanding before you burn
- !Bark edges can flake; handle them gently
- Size
- 14 x about 6 x 0.42 in (356 x 152 x 11 mm)
- Pack
- 6 signs
- Wood
- Basswood, live bark edge
- Hanger
- Jute rope
- Other size
- 10 in
3M Pro Grade Precision 3-in-1 Sanding Sponge, 220 Grit, 2 Pack
A fine foam block for a smooth face before burning and a clean one after.
A woodburning pen behaves best on a smooth surface. Fuzzy fibers and tiny ridges make the nib skip and drag, which shows up as uneven lines in lettering. A quick pass with fine sandpaper before you transfer the pattern takes care of it, and a block keeps the face flat rather than wavy.
After burning, the same sponge lifts leftover graphite lines and the faint scorch haze around strokes. Here a foam block has the edge over a hard one: it rides over the board with light, even pressure, so it’s easier to clean up the surface without sanding away the burn itself.
Pro tip Always sand with the grain, never in circles. Cross-grain scratches on pale basswood show up under the finish, and they look worse next to dark burned letters.
Why we like it
- ✓220 grit is fine enough to leave basswood smooth without scratches the pen can catch on
- ✓Flat, angled and contoured sides, so one sponge handles faces and edges
- ✓Foam backing follows the board, so you don't sand through a light burn
- ✓Washable and reusable, per 3M
Keep in mind
- !Too fine to remove saw marks or deep dents; start with 120 or 180 grit for that
- !A 2.5 x 4.5 in block is small for big boards
- !Will take a light burn right off if you sand over it carelessly
- Grit
- 220 (fine)
- Pack
- 2 sponges
- Size
- 2.5 x 4.5 x 1 in (64 x 114 x 25 mm)
- Abrasive
- Aluminum oxide on foam
- Use
- Wet or dry
- Other grits
- 80, 120, 180, 320
MyArtscape Graphite Transfer Paper, A4, 20 Sheets
Wax-free graphite that puts your printed lettering on the wood and erases later.
Very few people freehand a sign. The usual method is to design the lettering on a computer, print it, and trace it onto the wood. Graphite transfer paper goes between the printout and the board, and wherever you press, it leaves a thin gray line.
Wax-free graphite is the right kind for woodburning. Waxy carbon paper can leave marks that won’t erase and that an oil finish beads up on, while graphite lines that are still showing after burning can be lifted with an eraser or a light pass of fine sandpaper.
Pro tip Tape the printout to the board along one edge only, like a hinge. You can lift it to check how the transfer looks and lay it back down in exactly the same place.
Why we like it
- ✓Wax-free graphite, so lines erase and the finish isn't blocked by a waxy residue
- ✓Lines can be lifted with a kneaded eraser after burning
- ✓Each sheet can be reused for several transfers, per MyArtscape
- ✓A4 (8.27 x 11.69 in) sheets cover most of a sign in two pieces
Keep in mind
- !The package says the lines are lighter than carbon paper, so press firmly
- !A4 is shorter than a 14 in sign; long designs need two sheets side by side
- !Graphite smudges if your hand rests on the transferred lines
- Sheets
- 20
- Size
- A4, 8.27 x 11.69 in (210 x 297 mm)
- Type
- Graphite, wax-free
- Color
- Black
Royal & Langnickel Soft-Grip Embossing Stylus Set (3 Pack)
Ball-tip styluses that trace the pattern without tearing the printout.
Any pointed tool will trace a pattern, but a sharp pencil eventually tears through the printout and a ballpoint pen leaves ink on the paper that hides what you’ve already traced. A ball stylus does the job better: the round metal tip presses the graphite onto the wood with even pressure and rolls along curves without catching.
This set from Royal & Langnickel, a long-standing art brush maker, has double-ended styluses with different ball sizes. A small ball suits thin script lettering, and a larger one is quicker on bold outlines and simple holiday shapes like stars and trees.
Pro tip Trace in one direction, top to bottom and left to right, and tick off each finished word on the printout with a pen. Then nothing gets missed before you lift the pattern.
Why we like it
- ✓A rounded ball tip glides over the printout instead of tearing it like a pencil point
- ✓Several ball sizes for fine lettering and broader outlines
- ✓Soft grip handles are comfortable over a long tracing session
- ✓Leaves no pencil marks on your printed pattern, so it can be reused
Keep in mind
- !The tracing line is invisible on the printout, so it's easy to skip a letter
- !Light, small tools that roll off a sloped bench
- !Not made for heavy embossing of leather or metal
- Model
- SG95
- Pieces
- 3 double-ended styluses
- Tips
- Ball embossers in four sizes
YIHUA 939-II Wood Burning Station
A dial-controlled wire-nib station for even lettering and soft shading.
Most first woodburning pens are solid-tip tools that look like soldering irons. They work, but the tip takes a long time to heat and cool, and that’s what makes lettering blotchy: the tip sits at the start of a stroke and burns a dark dot. A wire-nib station like this one works differently. A thin loop of wire heats in seconds, and the control box sets how hot it runs.
For a sign that means steady, even letters and the option to turn the heat down for soft shading on the same board. The 939-II has a simple dial rather than a digital display, so the numbers are only a starting point; the practice pieces in the box are the place to find your settings.
Pro tip Burn a short test line at three dial settings on the back of your sign blank before you start. The same number burns differently on every board, and the back of the sign is the same wood as the front.
Why we like it
- ✓Wire-nib pen heats and cools fast, so lines stay even and you can pause mid-letter
- ✓Temperature dial from 482 to 1382°F (250–750°C) for light shading through dark outlines
- ✓20 wire nibs in a tin, including writing, skew and shader shapes
- ✓Pen holder, two letter stencils and two practice wood pieces in the box
Keep in mind
- !The dial has no digital readout, so settings are found by testing on scrap
- !Only one pen; switching nibs means letting it cool and swapping with pliers
- !US 110–127V plug only
- Model
- 939-II
- Temperature
- 482–1382°F (250–750°C), dial
- Pen
- Wire-nib, interchangeable nibs
- Nibs included
- 20
- Extras
- Pen holder, 2 stencils, 2 practice pieces, tweezers, pliers
- Power
- 110–127V, 60Hz, US plug
Hope's 100% Pure Tung Oil, 32 fl oz
A wipe-on oil that deepens the burn and protects the sign.
A woodburned sign needs some finish, both to protect the wood from handling and dust and to make the burned lines look richer. Brushing a film finish over burned lines can smear the loose char and gray the pale wood around them. A penetrating oil that’s wiped on in thin coats avoids most of that, and tung oil is a classic choice for it.
The trade-off is time. Pure tung oil has no driers or solvents, so it cures slowly, and each coat needs to dry before the next. For a holiday gift, that means finishing the sign a week or two ahead, not the night before. The oil also gives basswood a warm amber tone, which most people like on a rustic sign.
Pro tip Try the oil on the back or on a scrap burned with the same settings first. That shows how much it darkens the wood and the burn before it goes on the front.
Why we like it
- ✓Wipes on with a cloth, so there's no brush to drag soot across the burned lines
- ✓Soaks into the wood instead of forming a film, keeping a natural matte look
- ✓Resists moisture and everyday handling once cured, per Hope's
- ✓Considered non-toxic when dry, so it suits cutting boards too
Keep in mind
- !Pure tung oil cures slowly; allow days between coats and weeks for a full cure
- !Warms pale basswood to a honey tone, so the sign won't stay white
- !Oily rags can self-heat and catch fire; dry them flat or soak them in water
- Volume
- 32 fl oz (946 ml)
- Type
- 100% pure tung oil, no solvents
- Sheen
- Flat
- Model
- 692-32TO12