Assemble a Mobile Soldering Repair Kit for Markets & Fairs
A USB-C iron, a power bank and the few extras that matter, packed in one pouch for booth repairs, broken string lights and last-minute holiday fixes.
Published October 29, 2026 · 7 picks
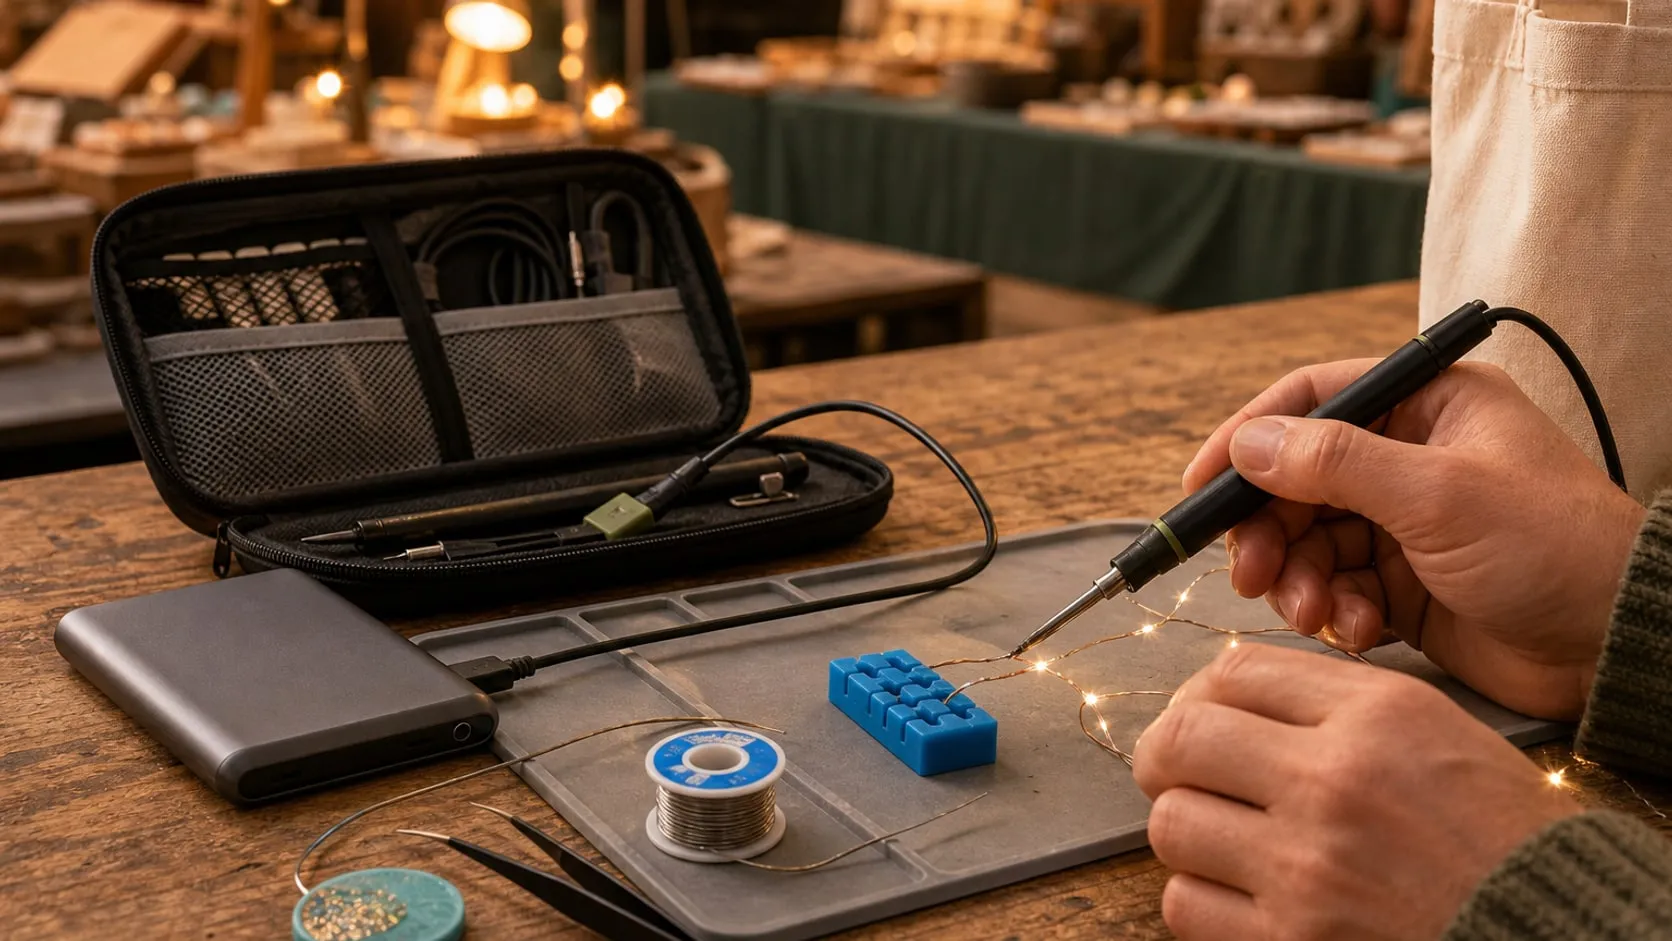
Craft-fair season is also broken-things season. A string of booth lights stops working halfway through the afternoon, a light-up piece you’re selling has a wire pulled loose, a customer asks if you can “just fix” a battery connector. A soldering station can’t come along, but a kit built around a USB-C iron can, and it fits in a pouch the size of a paperback. The first rescued string of lights is usually enough to earn its spot in the tote. Here’s how to put one together, step by step, with the parts for each step below.
Step 1: Pick a portable iron
There are three ways to solder without a wall outlet:
- USB-C irons (Pinecil, iFixit FixHub, TS-style irons) take power from a USB-C PD charger or power bank. They heat in seconds, have real temperature control and are the best fit for electronics.
- Butane irons need no electricity at all, but temperature control is rough, and many markets and indoor halls don’t allow open-flame or gas tools.
- Cordless irons with a built-in battery are the simplest to carry, but the battery limits the power and the run time, and when it’s flat the iron is done.
A USB-C iron is the most flexible: it runs from the same power bank that charges your phone and card reader. The Pinecil below is about as long as a marker and comes with a general-purpose conical tip. Add a fine tip if you work on small boards, and a chisel tip if you mostly splice wires.
Step 2: Power it
A USB-C iron only gets full heat with 20 V USB-C Power Delivery (PD). A phone charger that tops out at 5 V or 9 V will power it, but weakly, and joints will take forever. You need two things:
- A PD source with 65 W or more on one port. At home that’s a laptop-style USB-C charger. At a booth it’s a power bank with a high-output USB-C port, like the 140 W port on the one below.
- A cable rated for 100 W or more (often marked 5 A). The cable that comes with the bank is fine; a thin phone cable may not be.
Check the voltage on the iron’s screen the first time you plug it in. Two habits help at a market: charge the bank fully the night before, and expect it to switch itself off now and then while the iron sits idle in standby. Many power banks do that at very low draw; touching the iron or unplugging and re-plugging wakes things up.
Step 3: Solder (and flux)
For a repair kit, 0.8 mm (0.031 in) rosin core solder covers boards and wires alike. 63/37 tin-lead is the most forgiving: it melts at a lower temperature and sets in one step, so a joint is less likely to crack if the table gets bumped. Lead-free solder works too; run the iron about 30–40 °C hotter and give joints a bit longer.
If you use leaded solder, wash your hands before you eat or handle food, keep the spool in its own pocket, and don’t solder over anything a customer will eat from. A small pen of flux is worth adding for older, tarnished wires that refuse to take solder.
Step 4: Plan for mistakes
Every kit needs a way to undo a joint. Desoldering braid is the lightest option: lay it on the solder, press the iron on top, and the copper soaks the solder up. It also clears bridges between pins. A spring-loaded solder pump does a faster job on big through-hole joints; if you have room in the pouch, carry both.
Step 5: Set up a safe workspace on a folding table
At a booth you won’t have a bench, a vise or a helping hand. A few small things replace them:
- A silicone wire holder. Its grooves hold two wire ends in line, which is most of what portable repairs are. Its brass wool pocket cleans the tip without a wet sponge.
- Tweezers. They hold a wire against a pad, pull a part while the solder is liquid and pick up what you drop. Anti-static ones are worth having in dry winter air.
- A heat-proof surface. A silicone mat or a tile under the work protects a borrowed table.
- The tools you already own: a precision screwdriver set to open cases, flush cutters, a wire stripper and a few sizes of heat shrink tubing (a lighter or the iron’s barrel can shrink it in a pinch).
Safety basics: the Pinecil has no stand in the box, so set the hot iron down only on the heat-proof mat or a small metal iron rest, never on the tablecloth. Work at the back of the booth, away from customers’ hands and away from kids. Unplug the iron when you step away, even though it goes into standby. Keep a small cup of water or a damp cloth nearby, and check whether the venue has rules about hot tools before you set up.
Step 6: Pack it so nothing goes missing
Packing is what makes this a kit rather than a pile of tools. A padded two-layer pouch works well: power bank, iron, cable and tip cover on one side; solder, braid, tweezers, the silicone block and small tools on the other. Mesh pockets let you see at a glance what’s missing.
- Let the iron cool completely before it goes in the pouch, and fit a tip cover or a short piece of silicone tubing over the tip.
- Keep a checklist in the lid and run through it when you pack up. Small things vanish at the end of a long day.
- Add a few spares: a short length of wire in two colors, heat shrink, a couple of zip ties and a pack of the connectors your booth lights use.
What it costs in time: an evening to gather and pack it, and about five minutes to unpack at the booth. A typical wire repair takes ten minutes once the iron is hot. The parts for each step are below.
At a glance
7 picksAs an Amazon Associate I earn from qualifying purchases. If you buy through a link on this page we may earn a small commission, at no extra cost to you. How this works.
PINE64 Pinecil Smart Mini Portable Soldering Iron
A pen-sized smart iron that runs from USB-C PD instead of a wall station.
A soldering station needs a wall outlet and a corner of a bench. The Pinecil needs a USB-C cable. It’s a smart iron the size of a fat marker: the temperature control and a small screen sit in the handle, and the power comes from a USB-C PD charger or a power bank. That makes it the easiest iron to build a carry-along kit around.
It isn’t a toy iron, either. With a proper 20 V supply it heats up in seconds and holds temperature on ordinary through-hole and wire work, and it drops into standby when it’s set down, which matters on a busy table.
Pro tip Check the voltage on the screen the first time you plug it into a new charger or power bank. If it shows 5 V or 9 V instead of 20 V, the supply or the cable isn’t delivering full PD power, and the iron will feel weak.
Why we like it
- ✓Powered over USB-C (PD and QC 3.0) or a DC5525 barrel jack
- ✓Reaches working temperature in about 12 seconds, according to PINE64
- ✓Auto standby when the iron is put down
- ✓Slim, light handle (about 60 g) with a stainless steel core
- ✓Comes with a B2 conical tip
Keep in mind
- !No power supply, stand or tip cover in the box — you add them
- !Needs a charger or power bank that supplies 20 V USB-C PD for full heat; a 5 V phone charger won't do
- Power input
- USB-C (PD, QC 3.0) or DC5525 barrel jack
- Power
- Up to 65 W (per listing)
- Heat-up
- About 12 s
- Tip included
- Type B2
- Length
- 6.1 in (15.5 cm)
- Weight
- About 60 g
- Model
- PINECIL-BB2
UGREEN Nexode 25,000mAh 145W USB-C Power Bank
Up to 140 W from one USB-C port, enough to run the iron at full power off-grid.
A USB-C soldering iron is only as portable as its power source. Plenty of power banks top out at 20–30 W, which is enough for a phone and not enough to heat a soldering tip properly. A bank that can deliver 100 W or more from one USB-C port lets the iron run at its full 20 V, with headroom to spare.
This one is laptop-sized in capacity and output, and the screen takes the guessing out of “will it last the afternoon”. The other two ports handle a phone and a small booth light at the same time.
Pro tip Use the short 5 A USB-C cable that comes with it, or another cable rated for 100 W or more. A thin phone cable can force the iron down to a lower voltage. Charge the bank fully the night before a market.
Why we like it
- ✓One USB-C port delivers up to 140 W (PD 3.1), well above what a USB-C iron needs
- ✓25,000 mAh capacity
- ✓Digital display shows the remaining charge
- ✓Three ports (2 × USB-C, 1 × USB-A) for the iron, a phone and a light at once
- ✓Recharges in about 2 hours from a 65 W PD charger, according to UGREEN
- ✓USB-C to USB-C cable included
Keep in mind
- !About 1.1 lb (500 g) — fine in a bag, heavy in a pocket
- !Like most power banks, it may switch off when the load is very small, for example while the iron sits in standby
- Capacity
- 25,000 mAh
- Max output
- 145 W total, 140 W from one USB-C port
- Ports
- 2 × USB-C, 1 × USB-A
- Standards
- PD 3.1, QC 3.0
- Recharge
- About 2 h with a 65 W PD charger
- Size
- 6.3 × 3.2 × 1.1 in (160 × 81 × 27 mm)
- Model
- PB205
MAIYUM 63/37 Rosin Core Solder Wire, 0.8 mm, 50 g
Thin 63/37 rosin core solder that flows easily and fits in a pocket.
For a repair kit, the forgiving choice is 63/37 tin-lead solder. It goes from solid to liquid at one temperature instead of passing through a mushy stage, so a joint is less likely to crack if a hand or a wire moves while it cools. That helps when you’re working on a folding table instead of a bench.
The rosin core carries its own flux, so ordinary wire splices and through-hole joints need nothing else. The 50 g spool is small on purpose: it takes up little space and is easy to swap out.
Pro tip Prefer to avoid lead? Pack a spool of lead-free (SAC305 or similar) instead and run the iron about 30–40 °C hotter. Whichever you carry, don’t mix the two on the same joint.
Why we like it
- ✓63/37 tin-lead melts at a single point, 361 °F (183 °C), so joints set quickly and cleanly
- ✓Rosin flux core (1.8 %) — no separate flux needed for most jobs
- ✓0.8 mm (0.031 in) is thin enough for boards and thick enough for wires
- ✓50 g spool fits in a small pouch
Keep in mind
- !Contains lead — wash your hands after use and keep it away from kids, food and drinks
- !A small spool runs out quickly on big wire jobs
- Alloy
- Sn63 / Pb37 (tin-lead)
- Melting point
- 361 °F (183 °C)
- Flux
- Rosin core, 1.8 %
- Diameter
- 0.8 mm (0.031 in)
- Weight
- 50 g
Chemtronics Soder-Wick Rosin SD Desoldering Braid 80-3-5
Flux-loaded copper braid for undoing a joint with nothing but the iron.
Every repair kit needs a way to take solder off as well as put it on. A desoldering pump is great on a bench, but it takes space in a small kit and needs a free hand to cock it. Braid does the same job on pads and bridges with nothing but the iron: lay it on the joint, press the tip on top, and the copper pulls the molten solder up into the weave.
Chemtronics’ Soder-Wick has the flux already in the braid, which is what makes it wick quickly instead of just sitting there.
Pro tip Use a clean section of braid every time and press with the flat side of the tip, not the point. Lift the braid and the iron together, so the braid doesn’t solder itself to the pad as it cools.
Why we like it
- ✓Copper braid with rosin (RA) flux built in
- ✓Size
- ✓Comes on an ESD-safe static-dissipative bobbin
- ✓Weighs next to nothing and fits in any pocket of a kit
- ✓Works with leaded and lead-free solder
Keep in mind
- !5 ft (1.5 m) goes quickly; the used end is cut off and thrown away
- !Rosin flux leaves a residue that may need cleaning on a visible board
- Material
- Copper braid
- Flux
- Rosin activated (RA)
- Size
- #3, 2 mm (0.08 in) wide
- Length
- 5 ft (1.5 m)
- Bobbin
- ESD-safe, static-dissipative
- Model
- 80-3-5
YIHUA S200 Silicone Soldering Wire Holder with Brass Wool Cleaner
Silicone grooves hold two wires for a splice, with a brass wool tip cleaner built in.
Most portable repairs are wire repairs: a snapped lead on string lights, a cable that’s pulled out of a plug, a battery connector that came off. The hard part is holding two wire ends still while you solder them. This silicone block solves that with grooves that grip the wires in a straight line, so both hands are free for the iron and the solder.
Silicone makes sense for a kit. A slip of the iron doesn’t melt it, and it can be squashed into a bag without cracking. The brass wool pocket replaces the wet sponge, which is a nuisance away from a sink.
Pro tip Slide a piece of heat shrink over one wire before you lay the wires in the grooves. Once the joint is soldered, there’s no way to get it on.
Why we like it
- ✓Six grooves hold wires (32–7 AWG) in line for a splice, hands-free
- ✓Built-in brass wool tip cleaner — no wet sponge
- ✓Small tray catches insulation scraps and loose parts
- ✓Soft silicone survives being squashed in a bag
- ✓Weighs about 110 g
Keep in mind
- !Not a holster for the iron — it holds wires, not the soldering iron
- !Too small to hold a circuit board
- Material
- Heat-resistant silicone
- Wire grooves
- 6, for 32–7 AWG
- Tip cleaner
- Brass wool, built in
- Tray
- Yes, for scraps and small parts
- Weight
- About 110 g
- Model
- S200
iFixit Precision Tweezers Set (Extra Fine, Angled, Blunt)
Three anti-static tweezers for holding, placing and pulling small parts.
Tweezers do the job of a third hand on a portable kit: they hold a wire end against a pad, pull a part out while the solder is molten and fish a dropped screw out of a case. A set of three covers most of it. The fine tip is for small parts, the angled tip reaches around components, and the flat tip grips wires and connectors without biting into them.
The anti-static coating matters more than it sounds on a dry winter day at a fair, when a spark from your fingers can reach a board through bare metal tweezers.
Pro tip Steel tweezers conduct heat. When you hold a part while soldering, grip it a little further back from the joint, and the tweezers will soak up less of the iron’s heat.
Why we like it
- ✓Three tips in one set — extra fine, angled and flat
- ✓Anti-static (ESD-safe) coating for sensitive electronics
- ✓Fabric storage bag included
- ✓Lifetime warranty
Keep in mind
- !Only three shapes — a big set has more specialist tips
- !Fine tips bend if they're used to pry, so keep a separate tool for that
- Pieces
- 3 (extra fine, angled, flat/blunt)
- Material
- Steel with ESD-safe coating
- Length
- About 4.9 in (12.5 cm)
- Weight
- 18 g
- Storage
- Fabric bag
- Warranty
- Lifetime
- Model
- EU145060-3
FYY Electronic Organizer Travel Pouch, Medium
A padded two-layer pouch that keeps the whole kit together in a tote.
A repair kit works when everything is in one place and you can see what’s missing before you leave home. A padded tech pouch does that better than a toolbox: it opens flat like a book, the mesh pockets show what’s inside, and it slides into a tote next to everything else you’re bringing to the market.
The two layers split the kit naturally: power and the iron on one side, solder, braid and small tools on the other.
Pro tip Keep a printed checklist in the lid pocket: iron, tip cover, cable, power bank, solder, braid, tweezers, heat shrink. Check it before you leave and again when you pack up, when small things go missing.
Why we like it
- ✓Two zip compartments with 8 pockets, many of them see-through mesh
- ✓Padded shell keeps the iron and tips from rattling around
- ✓Water-resistant Oxford fabric
- ✓Wrist strap for carrying it on its own
- ✓Comes in several sizes and colors
Keep in mind
- !Not heat-proof — the iron has to be fully cool before it goes in
- !The medium size is tight for a large power bank plus tools; size up if your bank is bigger
- Size
- 8.3 × 5 × 2.6 in (21 × 12.7 × 6.6 cm)
- Compartments
- 2 layers, 8 pockets
- Material
- Water-resistant Oxford fabric, padded
- Closure
- Zipper
- Weight
- About 110 g