Laser-Engrave a Personalized Leather Wallet
Initials or a name burned into a natural veg-tan wallet, engraved flat, conditioned and stitched — the six steps and the tools for each one.
Published October 7, 2026 · 5 picks
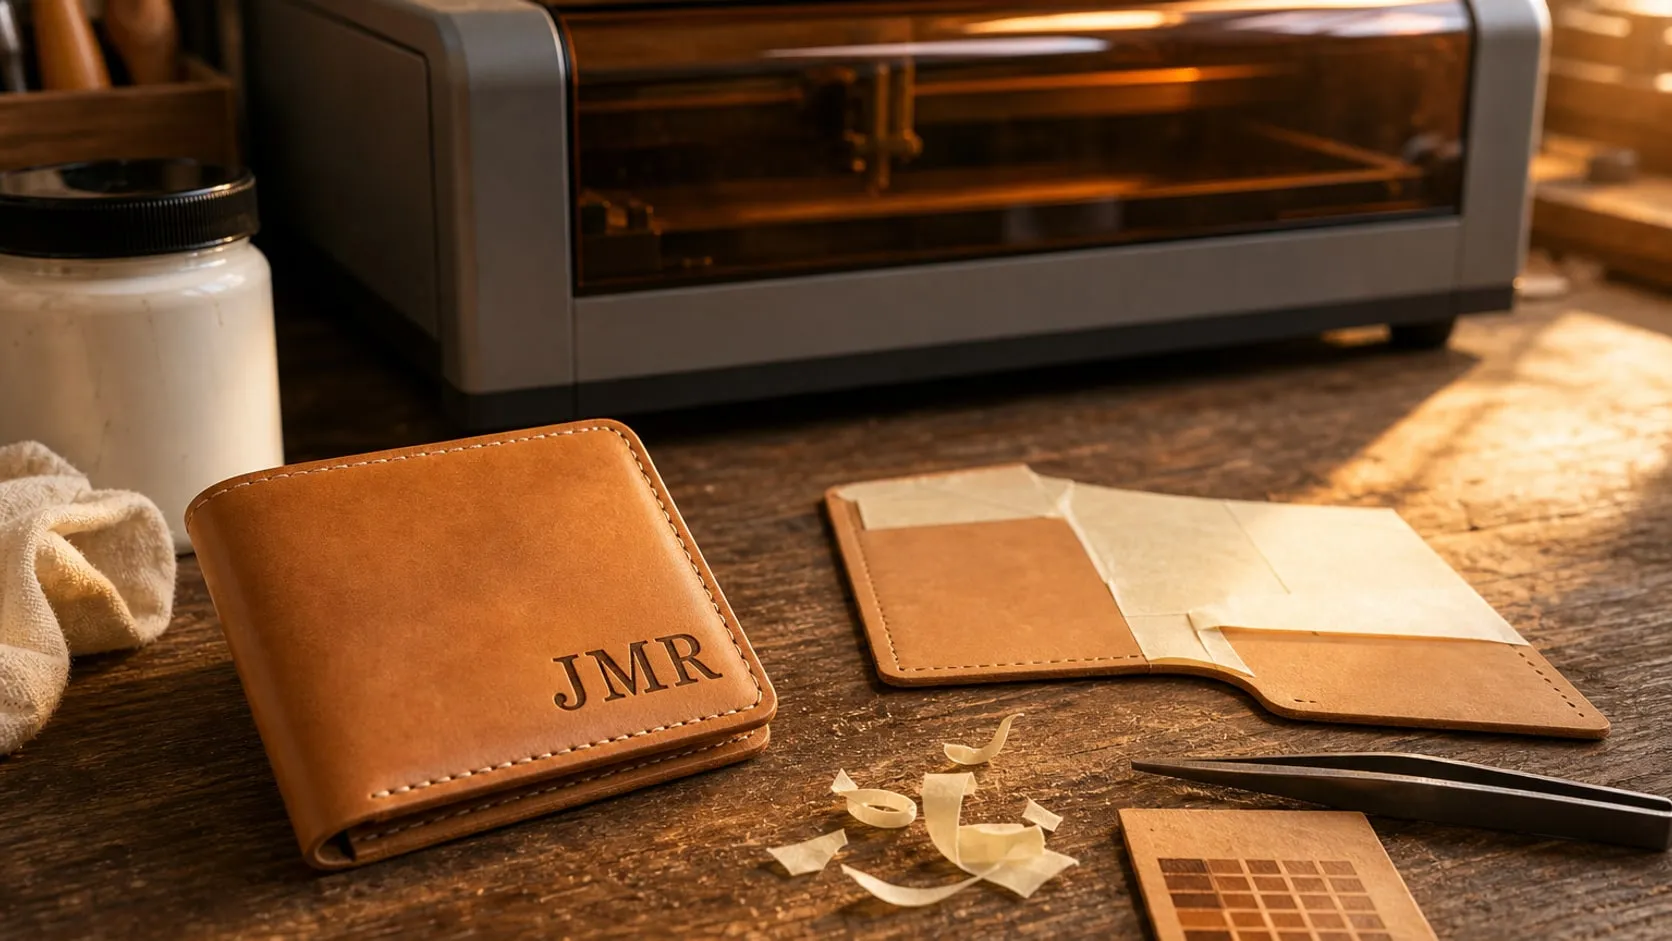
A wallet with someone’s initials on it gets carried every day for years, which is more than most gifts can say. The laser part is quick: a monogram on a wallet cover takes a few minutes to engrave. The rest is choosing leather that engraves cleanly, getting the settings right on a scrap, and finishing it so it lasts. Here’s the whole process, with the tools for each step below.
Step 1: Pick the right leather
The leather decides whether the engraving comes out a crisp brown or a smeared, smelly mess.
- Vegetable-tanned, natural, unfinished. Veg-tan (also sold as tooling leather) burns to an even brown and holds a sharp edge. It’s the standard for engraved leather goods.
- Avoid PU, “vegan”, bonded and coated leather unless the seller says it’s made for lasers. Many of them are plastic on top, and some contain PVC, which releases chlorine gas under a laser and corrodes the machine.
- Chrome-tanned leather (most soft, dyed wallets in stores) can be engraved, but it tends to give a weaker mark and a stronger smell. Start with veg-tan.
- Engrave flat, then assemble. A finished wallet has folds, stitching and pockets that keep it from lying flat. A kit of pre-cut pieces lets the cover go under the laser as a flat panel.
Get a piece of the same kind of leather for tests. Every hide burns a little differently, and the first engraving should never be the gift.
Step 2: Design the engraving
LightBurn (paid, with a free trial), LaserGRBL (free) or the laser’s own software all have a text tool. A wallet cover is small, so the design has to be simple.
- Initials, a short name or a small line logo. Three initials in a classic serif, or a first name, read well. Photos and fine artwork don’t belong on a 3 × 4 in cover.
- Size it. On a 3.25 × 4 in wallet, a monogram about 1–1.5 in (25–38 mm) wide sits well, centered or in the lower corner of the front cover.
- Bold strokes. Hairline script fonts break up on leather grain. Pick a font with strokes at least 0.5 mm wide at the size you’ll engrave.
- Mind the stitching. Keep the design at least 1/4 in (6 mm) inside the punched holes, or the stitches will run into it.
- Check which side is the outside. Lay the kit pieces out the way they assemble and mark the outer face of the cover with a bit of tape before it goes in the machine.
Check the spelling twice. Leather can’t be sanded back like wood.
Step 3: Prep and mask the leather
Keep the leather dry and clean: no conditioner, no oil and no water before engraving. Oil burns unevenly, and water leaves spots on natural veg-tan that show through any finish.
Then mask it. Lay paper transfer tape over the face of the cover, smooth it from the middle out with a card, and press it down firmly where the design will go. The laser burns through the paper; the yellow-brown smoke haze that would have stained the pale leather around the letters stays on the paper. Test the tape on a scrap first: on soft grain, a tape with too much tack can lift fibers when it comes off.
Lay the piece on the laser bed grain side up and tape its corners down outside the design area. Veg-tan likes to curl, and a lifted corner throws the focus off.
Step 4: Set up the laser safely
A laser that burns leather can burn skin, eyes and the room. The rules are the same as for any material.
- Lid closed, or glasses on. An enclosed Class 1 machine keeps the beam inside while the lid is shut. An open frame diode needs glasses rated for its wavelength (blue diodes run around 445–455 nm), worn by everyone in the room.
- Air out, not around. Burning leather smells strongly of burned hair and the smell clings to everything. Run the exhaust hose out of a window, or use a smoke purifier made for lasers. An enclosure contains the smoke; it doesn’t clean it.
- Never leave it running. Leather and the paper mask can both flare up. Keep a spray bottle of water or a small fire extinguisher at hand, and stay with the machine.
- Focus on the leather, on top of the mask, not on the bed. Use the machine’s focus gauge or auto focus.
- Place the design with the camera or a frame run. A camera image of the bed shows where the design lands on the cover; on a machine without one, run the frame function at lowest power before the real job.
Step 5: Test, then engrave
Leather needs far less power than wood. Too much, and the surface hardens, cracks or turns black and shiny at the edges. Run a test grid (LightBurn’s Material Test, or a few 1 cm squares) on the test leather, masked the same way as the real piece.
Starting points people commonly share for a 10 W diode on natural veg-tan, to narrow the grid:
- Fill (initials, text): 15–30% power at 3,000–6,000 mm/min, 0.1 mm line interval, one pass.
- Outlines (line logo): a little more power or a little less speed than the fill, one pass.
Peel the mask off the test and look at it in daylight:
- Pale, barely there? More power or less speed, but change only one at a time.
- Black, shiny or cracked edges, or the leather curled? Too much heat. Speed up first.
- Fuzzy edges? The focus is off, or the piece isn’t lying flat.
Most makers aim for an even, mid-to-dark brown with a slight depression you can feel with a fingertip, not a deep black burn: char rubs off on the next pair of jeans. Then condition one of the good test squares (Step 6) to see how much the finish darkens it, and engrave the real cover with the same settings.
Step 6: Clean, condition and assemble
- Peel the mask slowly, starting at a corner. Tweezers lift the paper out of small islands inside letters.
- Clean the engraving. A soft, dry toothbrush takes loose char out of the letters. Don’t scrub with a wet cloth: water on bare veg-tan leaves rings.
- Condition the cover. Work a thin coat of beeswax conditioner over the whole outer face with a soft cloth in small circles, edge to edge, so the leather darkens evenly. Brush a little into the engraving and wipe off any wax that sits in the letters.
- Let it rest overnight, then buff it with a clean cloth.
- Stitch it together following the kit’s instructions, with the engraved cover facing out.
The gift. A wallet in a small box with a card that says how to care for it (keep it dry, a thin coat of conditioner once or twice a year) looks finished. For a matching set, engrave the same initials on a keychain cut from the test leather.
What it costs in time: half an hour to design, half an hour for the test grid and a trial run, a few minutes of engraving, then an overnight rest and an evening of stitching. Start a week before the gift is needed. The tools for each step are below.
At a glance
5 picksAs an Amazon Associate I earn from qualifying purchases. If you buy through a link on this page we may earn a small commission, at no extra cost to you. How this works.
Tandy Leather DIY ID Wallet Kit
A pre-cut, pre-punched veg-tan wallet whose cover lies flat under the laser.
Most “blank wallets” sold for engraving are finished goods, often in PU or coated leather that a laser handles badly. A kit in natural tooling leather is the opposite: the leather is raw vegetable-tanned hide with nothing on its face, which is what burns cleanly under a laser, and the pieces lie flat on the bed before they become a wallet.
That order matters. A finished bifold has a fold, a stitched edge and pockets that keep it from lying flat, so the focus is never quite even. Here the cover is a flat panel: engrave it, condition it, then stitch the wallet around it.
Pro tip Before engraving, lay the pieces out the way the instructions assemble them and mark the outside of the cover with a small piece of tape. On a pre-punched panel, the stitching holes tell you where the edges will be; keep the design at least 1/4 in (6 mm) inside them.
Why we like it
- ✓Pre-cut and pre-punched, so the only cutting is done by the laser and the only tools are a needle and thread
- ✓Natural tooling (vegetable-tanned) leather surface, the kind that engraves to a clean, even brown
- ✓The cover can be engraved while it's still a flat piece, before anything is stitched
- ✓Waxed thread, needle and instructions are in the box
- ✓Folds to a compact 3.25 × 4 in (8.3 × 10.2 cm) with an ID window and pockets for cash and cards
Keep in mind
- !Small — a design has to fit a cover of about 3 × 4 in, so it suits initials and short names, not big artwork
- !The product photo shows a carved and dyed example; the kit arrives as plain natural leather
- !Hand-stitching takes an evening the first time
- Leather
- Natural tooling leather, brown pocket lining
- Finished size
- 3.25 × 4 in (8.3 × 10.2 cm), bifold
- Features
- ID window, card and cash pockets
- Included
- Pre-punched leather pieces, waxed thread, needle, instructions
- Weight
- 2.4 oz (68 g)
- Model
- 4141-00
Realeather Veg-Tan Double Shoulder, 4–5 oz, Natural
Natural veg-tan in wallet weight for test grids and matching keychains.
Every hide burns a little differently, so the first engraving should never be the gift. A plain piece of veg-tan in the same weight as the wallet is the place to run a test grid, find the power and speed that give an even brown, and see how much the conditioner darkens it, all without risking the wallet cover.
The leftovers don’t go to waste. A strip of 4–5 oz leather engraved with the same initials becomes a keychain or a card sleeve to go with the wallet, and a matching set looks more deliberate than a single piece.
Pro tip Cut test squares from the smoothest part of the shoulder and write the settings on the back with a pencil. Keep the best one: it’s the reference for every wallet that follows.
Why we like it
- ✓Unfinished vegetable-tanned cowhide, the same kind of leather as a natural wallet kit
- ✓4–5 oz (about 1.6–2 mm) is wallet and keychain weight
- ✓A double shoulder gives plenty of offcuts for test grids before engraving the real piece
- ✓Can be tooled, stamped, dyed and wet-molded as well as engraved
Keep in mind
- !A natural hide — the color and surface vary across the piece, so test on a scrap from near where the real part comes from
- !Shoulder leather can show growth marks and wrinkles that engrave differently from the smooth areas
- !Unfinished leather marks easily; water spots and fingerprints show until it's conditioned
- Leather
- Vegetable-tanned cowhide double shoulder, unfinished
- Weight (thickness)
- 4–5 oz, about 1.6–2.0 mm
- Color
- Natural
- Uses
- Tooling, stamping, dyeing, wet molding, laser engraving
- Model
- LRSS 0405
VViViD Premium Direct-Apply Paper Transfer Tape, 12 in × 100 ft
A paper mask that keeps the smoke haze off the pale leather.
Natural veg-tan is pale, and the smoke from the laser leaves a yellow-brown haze around the engraving that soaks into the grain. On wood, sanding takes it off; on leather, sanding ruins the surface. A paper mask is the simple answer: the laser burns through it where the design is, and the haze lands on paper instead of leather.
Paper matters here. Many vinyl transfer tapes are clear plastic, which shouldn’t go under a laser at all. This one is paper with a medium tack, which is what laser makers use for masking, and VViViD names that use on the listing.
Pro tip Press the tape onto the leather once, peel it off and put it back on. The first pass leaves a little lint from the leather on the glue, which takes the edge off the tack and makes the mask easier to lift from soft grain.
Why we like it
- ✓Paper, not plastic — VViViD lists it as a masking tape for laser cutting and engraving
- ✓Medium-tack, lay-flat adhesive that grips a smooth surface and peels off by hand
- ✓12 in wide, so one strip covers a whole wallet cover or several test pieces
- ✓100 ft roll lasts for many projects
Keep in mind
- !Leather isn't on the maker's list of surfaces — test it on a scrap of the same leather before masking the real piece
- !Paper can catch a small flame under a slow, high-power pass; the laser must never run unattended
- !Small islands in letters (inside an e or an o) need tweezers to pick out
- Material
- Paper, medium-tack lay-flat adhesive
- Size
- 12 in × 100 ft (30.5 cm × 30.5 m)
- Surfaces (per VViViD)
- Glass, metal, plastic, wood, ceramic
- Also sold
- 6 in wide, and 50 and 300 ft rolls
Creality Falcon A1 10W Enclosed Laser Engraver
An enclosed Class 1 diode with a camera for placing a design on a small piece.
A wallet cover is small, and a design that’s 2 mm off center looks wrong. That’s where a camera earns its place: the image of the bed shows the leather piece, the design is dragged onto it on screen, and the job lands where it was placed instead of where a guess put it.
The enclosure is the other reason this machine fits leather work. Creality rates the Falcon A1 Class 1, so with the lid closed the beam stays inside, and the box keeps the smoke in one place where an exhaust hose can carry it out. The machine still needs a window or a vent, and someone in the room while it runs.
Pro tip Tape the leather down to the honeycomb at the corners, outside the design. Veg-tan isn’t perfectly flat, and a corner that lifts a millimetre or two shifts the focus and the camera’s view of where the edge is.
Why we like it
- ✓Fully enclosed with a tinted lid; Creality rates it Class 1 and says it blocks 99% of laser light
- ✓HD camera for positioning a design on a small piece, which a wallet cover needs
- ✓Pauses when the lid opens, plus an emergency stop button
- ✓Comes pre-assembled
- ✓Works with Creality's Falcon Design Space as well as LightBurn and LaserGRBL
- ✓Up to 600 mm/s (36,000 mm/min) on a CoreXY motion system
Keep in mind
- !Heavy and bulky at 28.7 lb — it needs a dedicated table spot
- !The enclosure contains smoke but doesn't clean it; burned leather smells strong, so the exhaust still has to go outside
- !The camera's material recognition is a starting point, not a substitute for a test on the actual leather
- !Not for highly reflective materials such as mirror-finish metal or mirrored acrylic, per Creality
- Laser
- 10 W optical, blue diode
- Safety
- Class 1, enclosed, lid interlock, emergency stop
- Max speed
- 600 mm/s
- Positioning
- HD camera
- Software
- Falcon Design Space, LightBurn, LaserGRBL
- Honeycomb panel
- 460 × 346 mm (18.1 × 13.6 in)
- Weight
- 28.7 lb (13 kg)
- Model
- Falcon A1 10W
Fiebing's Aussie Leather Conditioner with Beeswax
A beeswax conditioner that puts back the oil and seals the cover.
The laser takes the moisture out of the leather it burns, and a natural veg-tan wallet that goes straight from the machine into a pocket marks with every drop of water and every greasy finger. A conditioner puts oil back into the fibers, and a wax in it slows down how fast water gets in.
The catch with natural veg-tan is color. Any oil or wax darkens it, sometimes by a lot, and the pale leather around the engraving is what makes the design stand out. That’s why it gets tested on the same scrap as the laser settings: some makers like the warmer, darker look, others use a thin coat and buff it hard.
Pro tip Apply it in thin coats with a soft cloth in small circles, over the whole panel at once rather than patch by patch. Uneven coverage on veg-tan shows as blotches; one even, thin coat and a buff the next day look better than one heavy coat.
Why we like it
- ✓Contains beeswax, which stays near the surface and gives raw veg-tan some water resistance
- ✓Soft paste that works into the engraved areas with a cloth or a small brush
- ✓Fiebing's lists leathercraft among its uses, along with saddles, boots and bags
- ✓A large jar — a wallet takes a fingertip's worth, so it lasts for many projects
Keep in mind
- !Darkens natural veg-tan noticeably, which also lowers the contrast of the engraving — test on a scrap first
- !Can leave a waxy film in the engraved letters unless it's brushed out and buffed
- !Not a hard top coat; the wallet needs another thin coat when it looks dry
- Type
- Leather conditioner with beeswax
- Size
- About 14–15 oz (label 15 fl oz, 400 g)
- For
- Leathercraft, saddles and tack, boots, shoes, bags, furniture
- Made in
- USA
- Model
- AULC00T015Z