Pour Your Dog's Paw Print in Epoxy Resin
Your dog's real paw print sealed under glossy resin — a handmade keepsake gift for any dog person, in six steps, with the tools and safety gear for each.
Published October 5, 2026 · 7 picks
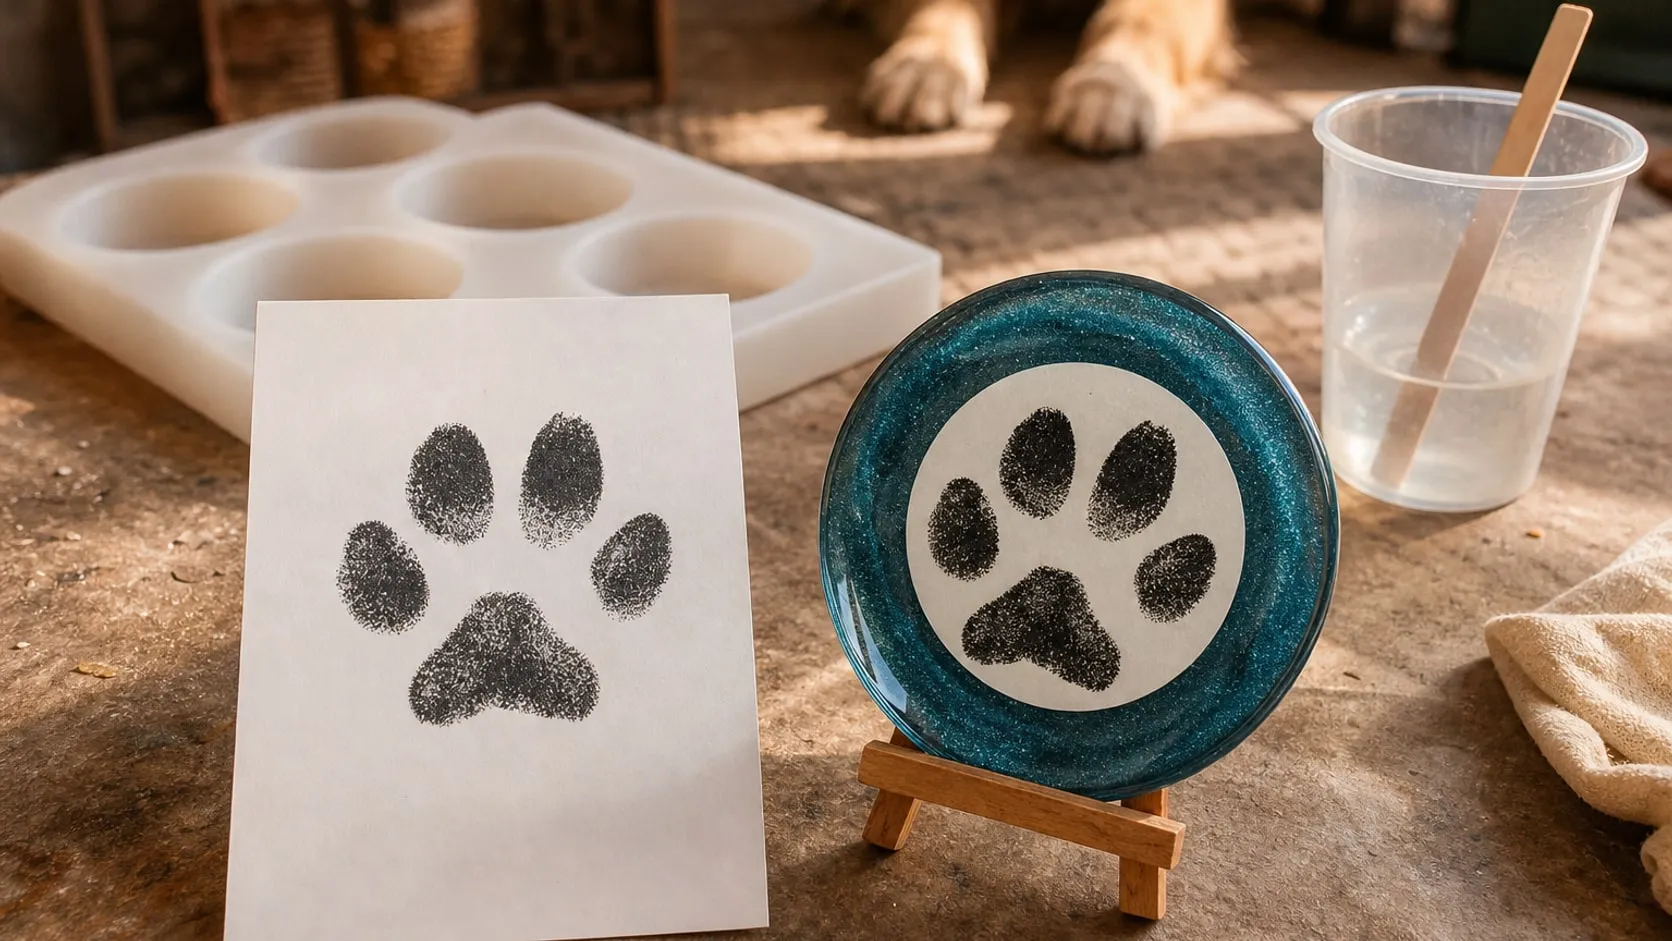
A paw print on a card is the kind of thing that ends up in a drawer. The same print under a clear, glossy layer of resin, with a shimmer of color behind it, ends up on a shelf. It’s a gift for anyone whose dog is family: a partner, your parents, a friend with a new puppy, or the owner of an old dog, for whom it will mean more every year. And it can’t be bought, because there is only one paw like that. Here’s the whole process, with the tools for each step below.
Step 1: Take the paw print
The print is ink on card, so nothing wet or sticky goes near the dog. With a clean-touch pad the paw doesn’t touch the ink either.
- Pick a calm moment, after a walk or a meal. A second person with treats helps.
- Wipe the paw clean and dry. Long fur between the pads blurs the print; hold it back or have it trimmed first.
- Work on a hard, flat surface. Card on a clipboard, pad on top with the ink side down, then press the paw firmly on the clean side and lift it straight up.
- Make several prints and choose the sharpest one later.
- Check the size. The print has to fit a 3.9 in (10 cm) round mold with a margin. For a bigger paw, photocopy the print a little smaller.
Is the gift for someone else’s dog, or in memory of a dog that’s no longer here? Ask for a print the family already has. Many vets and groomers make one, and a photocopy of it works the same way.
Step 2: Dry, cut and seal the print
Let the ink dry for a day or two (the pad’s maker says 24–48 hours). Then:
- Make a copy if you want to keep the original. A laser print or photocopy on white cardstock works. Inkjet ink can smear under a wet sealer.
- Cut it into a circle about 3.5 in (9 cm) across, or smaller for a small paw. Add the dog’s name and the date with a waterproof pigment pen if you like.
- Seal both sides and the cut edge. Bare paper soaks up resin and turns dark and blotchy. Brush on two or three thin coats of a clear-drying decoupage sealer, letting each one dry, or cover both sides with clear packing tape that reaches past the edge.
- Let it dry overnight. Moisture trapped in the paper leaves cloudy patches in the resin.
Step 3: Set up the room and yourself
Resin work is safe when it’s set up properly, and the setup takes ten minutes.
- A level table, covered with a plastic sheet or a silicone mat. Resin levels itself, so a tilted mold gives a wedge-shaped keepsake.
- A warm room, around 70–75 °F (21–24 °C). Cold resin stays thick and cures slowly.
- Fresh air. Open a window and let a fan push air out of the room. If the room can’t be aired out well, wear a respirator with organic vapor cartridges.
- Gloves, long sleeves and safety glasses from the moment the bottles are opened.
- No pets and no kids in the room until the resin is hard. A dog hair in the pour is the best case; a lick of liquid resin means a call to the vet.
Step 4: Mix the resin
One keepsake about 3/8 in (10 mm) thick takes roughly 2.5 oz (75 ml) of mixed resin, poured in two layers. For the first layer:
- Measure equal volumes of resin and hardener, about 1/2 oz (15 ml) of each. The kit below mixes 1:1 by volume; other resins use other ratios, so follow the label exactly. Extra hardener doesn’t speed up the cure, it leaves the resin sticky.
- Stir slowly for the full time on the label (five minutes for this kit), scraping the sides and bottom of the cup. Unmixed resin from the cup wall is the usual cause of soft spots.
- Let the cup stand for a few minutes so the bubbles rise.
Very small batches are hard to measure accurately. Pouring two or three keepsakes at once makes the amounts easier to get right, and leaves you a spare.
Step 5: Pour in two layers
In a mold, the bottom becomes the front. So the clear layer goes in first, the print goes in face down, and the color goes behind it.
- Clear layer. Pour about 1/8 in (3 mm) of clear resin into the cavity. After a few minutes, pop the surface bubbles with warm air: hold the heat tool 6–8 in (15–20 cm) above, keep it moving and stop after a few seconds. Don’t use a torch or a lighter on a silicone mold.
- Wait until it’s tacky. After a few hours, depending on the resin and the room, the layer should feel like tape when you touch its edge with a gloved fingertip: sticky but firm. That keeps the print from sinking to the front.
- Bed the print. Mix the second batch, about 1.5 oz (45 ml). Before adding any color, spread a little clear resin on the face of the print, lower it face down from one edge so no air gets trapped, and press it flat with a stir stick.
- Color and fill. Stir a pinch of mica powder into the rest and pour it over the back of the print, up to about 3/8 in (10 mm) in total. Pop the bubbles again.
Step 6: Cure, demold and finish
Cover the mold with an upturned box to keep dust and dog hair off, and leave it alone. The kit below cures in about 24 hours at room temperature, longer in a cool room. If the back still dents under a fingernail, give it another day.
- Demold. Peel the silicone away from the edge all the way around, then push from below.
- Sand the rim. The open side of the mold leaves a sharp raised edge on the back. Wet-sand it with 400–600 grit paper, and wear a dust mask or the respirator with its P95 filters; resin dust shouldn’t be breathed in.
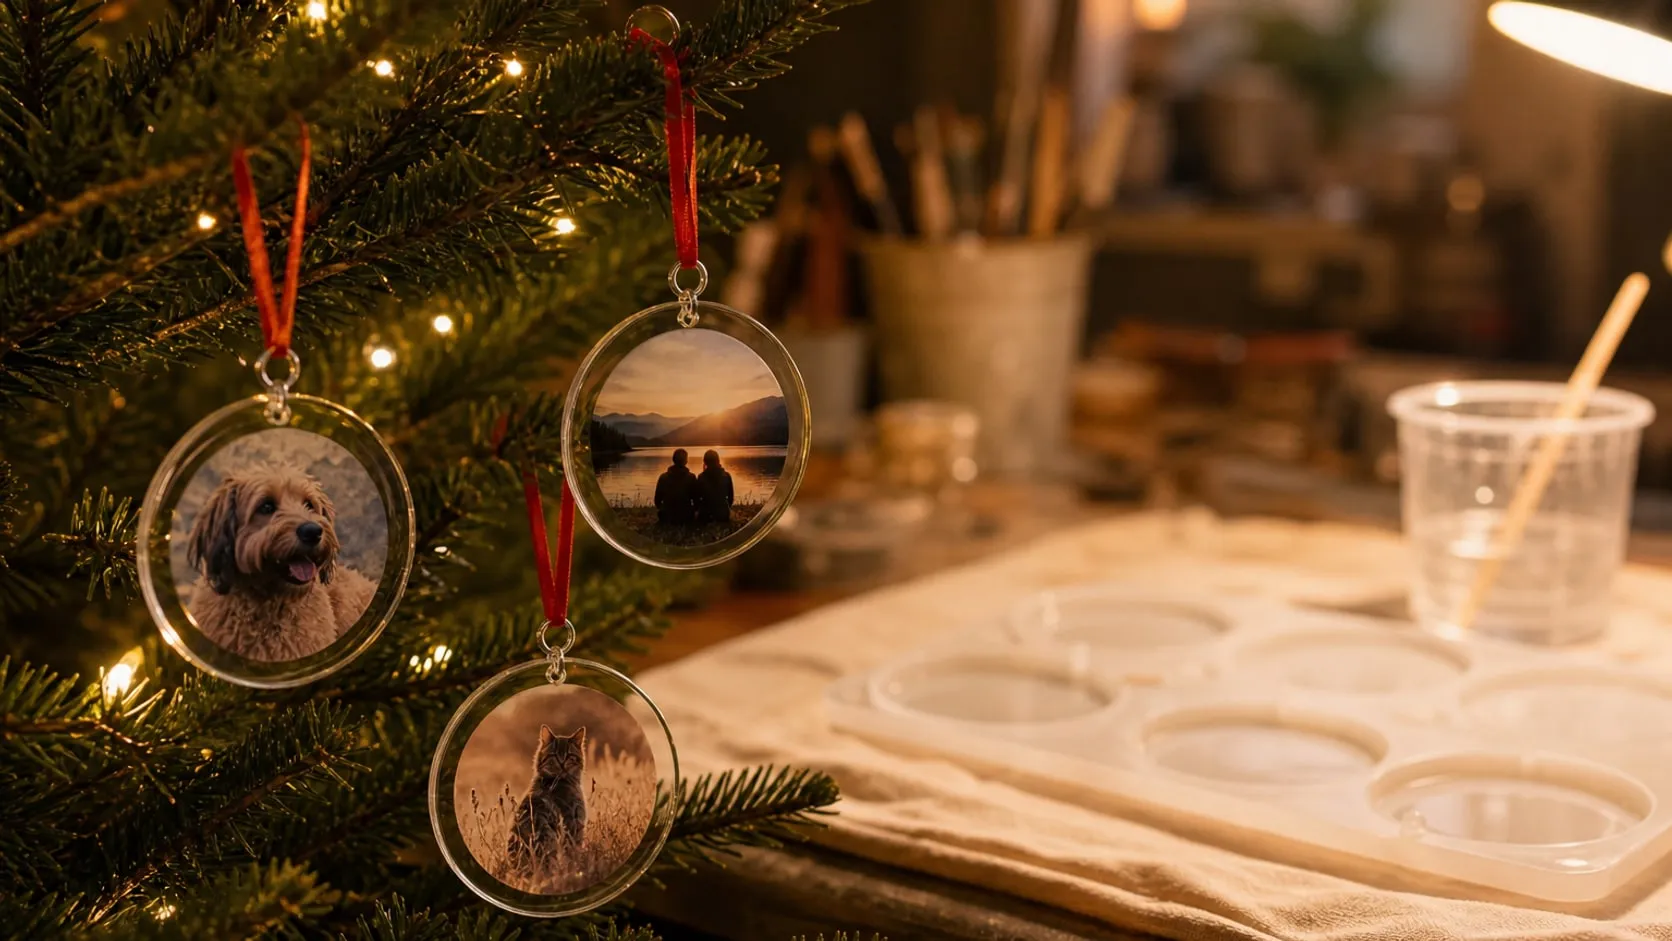
- Finish it as a gift. Stand it on a small plate easel, stick felt pads on the back for a paperweight, or drill a 1/8 in (3 mm) hole near the edge and add a ribbon for a tree ornament.
A few safety notes: let leftover resin harden in the cup before throwing it away, and never pour liquid resin down a drain. Epoxy slowly yellows in direct sun, so the keepsake belongs on a shelf, not a windowsill. And it’s a keepsake for the owner, not a chew toy for the dog.
What it costs in time: ten minutes for the print and a day or two for the ink to dry, an evening to seal it, about an hour of actual resin work spread over an afternoon, and a day or more of curing. Start at least a week before the gift is needed. The tools for steps 1 to 5 are below.
At a glance
7 picksAs an Amazon Associate I earn from qualifying purchases. If you buy through a link on this page we may earn a small commission, at no extra cost to you. How this works.
Pearhead Clean-Touch Paw Print Ink Pad Kit, Small/Medium
The paw presses on the clean side of the pad, so no ink ends up on the dog.
The hard part of a paw print keepsake isn’t the resin, it’s the print: a dog that won’t stand still, and ink you’d rather not have on a paw that gets licked. A clean-touch pad solves the second problem. The ink sits on the side facing the card, the paw presses on the dry side, and nothing has to be washed off afterwards.
The window on this version fits small and medium paws. Measure the paw first: if it’s wider than about 2 in (5 cm), the Medium/Large pad on the same listing gives you room to miss the center a little.
Pro tip Do a dry run first: press the paw on plain paper without the pad, so the dog learns it’s a boring game with a treat at the end. Then make the real print on a hard surface such as a clipboard, and lift the paw straight up so the print doesn’t smear.
Why we like it
- ✓Zero ink contact — the ink side faces the card, the paw presses on the clean side
- ✓Pearhead describes the black ink as certified non-toxic
- ✓Prints on the two included cards or on any paper or card
- ✓Ink window of 2.25 × 3.5 in suits small and medium paws
Keep in mind
- !The print needs 24–48 hours to dry before you seal it or pour resin over it
- !Black ink only
- !This link is Small/Medium — for a big dog pick the Medium/Large version on the same listing
- Ink window
- 2.25 × 3.5 in (57 × 89 mm)
- Pad size
- 5 × 3.25 in
- Ink
- Black, non-toxic per Pearhead
- Included
- 1 ink pad, 2 imprint cards
- Drying time
- 24–48 hours
- Model
- 83034
GLOVEWORKS Black Nitrile Gloves, 5 mil, Box of 100
Five mil of nitrile between your hands and the liquid epoxy.
Epoxy is a skin sensitizer. One spill rarely does harm, but repeated contact can lead to an allergy that returns with every later pour. Gloves go on before the bottles are opened and stay on until the cups are cleaned up.
Nitrile is the usual glove material for epoxy work. A 5 mil glove is less likely to tear on the edge of a mold or a cup than a thin one, and resin drips show up clearly on black.
Pro tip Keep a second pair within reach. If resin gets on a glove, peel it off inside out and put on a fresh one rather than wiping it. If resin does reach your skin, wash it off with soap and water, not with alcohol or solvents.
Why we like it
- ✓5 mil nitrile — thicker than standard 3 mil disposable gloves
- ✓Latex-free and powder-free
- ✓Lightly textured for grip on cups and bottles
- ✓Sizes from S to XXL on the same listing
Keep in mind
- !Wrist-length (24 cm) — forearms stay bare, so wear long sleeves
- !Marked for non-medical use
- !This link is size Large; pick your size on Amazon
- Material
- Nitrile, latex- and powder-free
- Thickness
- 5 mil (0.13 mm)
- Length
- 24 cm (9.4 in)
- Surface
- Lightly textured
- Count
- 100
- Model
- GPNB46100-BX
3M Paint Project Reusable Respirator 6211, OV/P95, Medium
Organic vapor cartridges for the pour, P95 filters for the sanding.
“Low odor” on a resin label doesn’t mean nothing is in the air. For one small pour next to an open window, good ventilation is the main protection. A respirator makes sense when the room can’t be aired out properly, when pouring becomes a regular hobby, or when it’s time to sand.
This kit covers both cases: the organic vapor cartridges are for the fumes while mixing and pouring, and the P95 filters catch the fine dust from sanding the edges of a cured piece.
Pro tip Between sessions, keep the respirator in a sealed zip bag. Organic vapor cartridges keep absorbing from the room air when they’re left out. Replace them when you start to smell resin through the mask.
Why we like it
- ✓NIOSH-approved 6001 organic vapor cartridges and 5P71 P95 particulate filters
- ✓Complete kit — facepiece, cartridges, filter retainers and two pairs of filters
- ✓3M bayonet connection takes a wide range of 3M cartridges and filters
- ✓Reusable facepiece; only the cartridges and filters get replaced
Keep in mind
- !This link is size Medium; Large is a separate listing
- !It only works with a tight seal — a beard or stubble under the edge lets vapors in
- !Cartridges wear out with use and exposure to air, and replacements are bought separately
- Type
- Reusable half facepiece
- Cartridges
- 3M 6001 organic vapor, 1 pair
- Filters
- 3M 5P71 P95, 2 pairs, with 501 retainers
- Approval
- NIOSH
- Connection
- 3M bayonet
- Size
- Medium
- Part number
- 6211P1-DC
LET'S RESIN 34 oz Crystal Clear Epoxy Resin Kit
A 1:1 casting epoxy with measuring cups and sticks in the box.
Epoxy resin comes as two liquids that harden only when mixed in the right ratio. With this kit the ratio is the easy one: equal volumes of A and B. The measuring cups and sticks are already in the box, which matters for a one-off gift project, because the pour can start as soon as the kit arrives.
A liter is far more than one keepsake needs, and that’s useful: the first mix can be a small test in a spare mold cavity before the real print goes in.
Pro tip In a cold room the resin thickens and holds on to bubbles. LET’S RESIN suggests standing both closed bottles in 122 °F (50 °C) water for 5–10 minutes, then working at room temperature. Dry the bottles before opening them; water in the mix leaves cloudy spots.
Why we like it
- ✓Simple 1:1 mix by volume
- ✓Kit includes measuring cups, small disposable cups and mixing sticks
- ✓Six small mica powders included for a first try at color
- ✓LET'S RESIN describes the formula as low-odor and UV-stabilized against yellowing
- ✓About a liter in total — roughly a dozen 4-inch keepsakes poured 3/8 in thick
Keep in mind
- !Cure time depends on room temperature and the size of the pour — treat 24 hours as the minimum
- !Not suitable for tumblers, per the listing
- !The included mica colors are 5 g samples
- Contents
- 17 oz resin + 17 oz hardener (2 × 500 ml)
- Mix ratio
- 1:1 by volume
- Stirring
- 5 minutes, slowly
- Cure
- About 24 hours, longer in a cold room
- Included
- 4 measuring cups (8 oz), 10 disposable cups, 4 sticks, 6 × 5 g mica
LET'S RESIN Extra Deep Round Coaster Mold, 6 Cavities, 3.9 in
Round 3.9 in cavities with a glossy inside for a glass-like front.
In a silicone mold, the bottom of the cavity becomes the front of the piece. A glossy mold gives a glossy, glass-like face with no sanding or polishing, which is what makes a paw print under clear resin look finished.
The cavities are deeper than a keepsake needs. There’s no need to fill them: about 3/8 in (10 mm) of resin is enough for a disc that feels solid in the hand and stands on a small easel. The spare cavities are handy for a test pour or for prints of the other paws.
Pro tip Wash a new mold with mild soapy water, let it dry fully and lift any dust or dog hair out of the cavity with a piece of tape before pouring. Whatever sits on the bottom of the mold ends up on the front of the keepsake.
Why we like it
- ✓Each cavity is 3.9 in across, so a medium dog's paw print fits with a margin
- ✓0.8 in deep — pour a thin keepsake or a thick paperweight in the same mold
- ✓Glossy interior, so the casting comes out shiny without polishing
- ✓Six cavities in one sheet for a whole set of gifts, or a test pour next to the real one
Keep in mind
- !LET'S RESIN warns against lighters and torches on the mold — flame damages the silicone and the next casting sticks
- !One joined sheet of six, over a foot long — it needs a flat, level surface
- !Round only, and a paw wider than about 3.5 in needs a bigger mold or a scaled-down copy of the print
- Cavities
- 6 round
- Cavity diameter
- 3.9 in (99 mm)
- Depth
- 0.8 in (20 mm)
- Full cavity
- About 5.5 oz of resin
- Material
- Silicone, glossy interior
- Model
- ELR00269
Rolio Mica Powder Pearlescent Set, 24 Jars × 10 g
A pinch of pearlescent powder for the shimmering layer behind the print.
A black paw print on white card looks plain in clear resin. A tinted second layer behind it changes that: the print sits in front of a deep, shimmering background, and the back of the keepsake looks finished too. Mica powder is the usual way to get that effect, because it stirs straight into mixed resin.
With 24 colors there’s room to match the gift to the dog or the person: a copper close to the coat, the blue of the collar, or gold for a holiday ornament.
Pro tip Add the powder to mixed resin with the tip of a stir stick, a little at a time, and stir until there are no dry specks along the cup wall. Too much pigment can keep resin from curing hard, so stop as soon as the color looks right.
Why we like it
- ✓24 colors, from blues and greens to gold, copper, black and white
- ✓Resealable screw-top jars, about 10 g (0.35 oz) each
- ✓Rolio describes the pigments as cosmetic-grade
- ✓A little goes a long way — one jar colors many small pours
Keep in mind
- !Loose powder — Rolio notes some may sit on the outside of the jars, so open them over a covered surface
- !Mica gives shimmer, not a flat solid color, and it can settle toward the bottom of a slow-curing pour
- Colors
- 24
- Per jar
- About 10 g (0.35 oz)
- Container
- Resealable jars
- Form
- Loose pearlescent powder
- Model
- RMP-10022019
CalPalmy Bubble Removing Heat Tool for Epoxy Resin
Warm air that pops surface bubbles with no flame near the silicone.
Stirring puts air into resin, and the bubbles that rise to the surface have to be popped before it sets. A torch does that in a second, but mold makers warn that flame damages silicone. Warm air is the gentler way, and a small craft heat tool is easier to aim at one mold cavity than a hair dryer, which mostly blows the resin around.
A few seconds per pour is all it takes, so the short run time isn’t a problem for this job.
Pro tip CalPalmy says to hold the tool at a 45-degree angle, so hot air doesn’t flow back into it, and to keep the rear intake clear. Stay 6–8 in (15–20 cm) above the resin and keep moving; stop as soon as the surface clears.
Why we like it
- ✓Heats up to 390 °F (200 °C), well below a workshop heat gun
- ✓Slim body, 8.8 in long and 1.8 in wide, held in one hand
- ✓Fold-out stainless steel stand for hands-free use
- ✓No open flame near silicone molds
Keep in mind
- !Run it for under 3 minutes at a time — the listing warns the plastic parts can melt beyond that
- !The cord is only 38 in (97 cm), so the pour has to happen near an outlet
- !This link is the pink one; other colors are on the same listing
- Max temperature
- 390 °F (200 °C)
- Size
- 8.8 × 1.8 in
- Cord
- 38 in (97 cm)
- Stand
- Fold-out stainless steel
- Run time
- Under 3 minutes at a stretch
- Weight
- 0.27 kg (0.6 lb)