Make Resin Photo Ornaments for Holiday Gifts
A favorite photo sealed in a clear, glossy resin disc that hangs on the tree — a weekend project in six steps, with the tools for each one.
Published October 16, 2026 · 7 picks
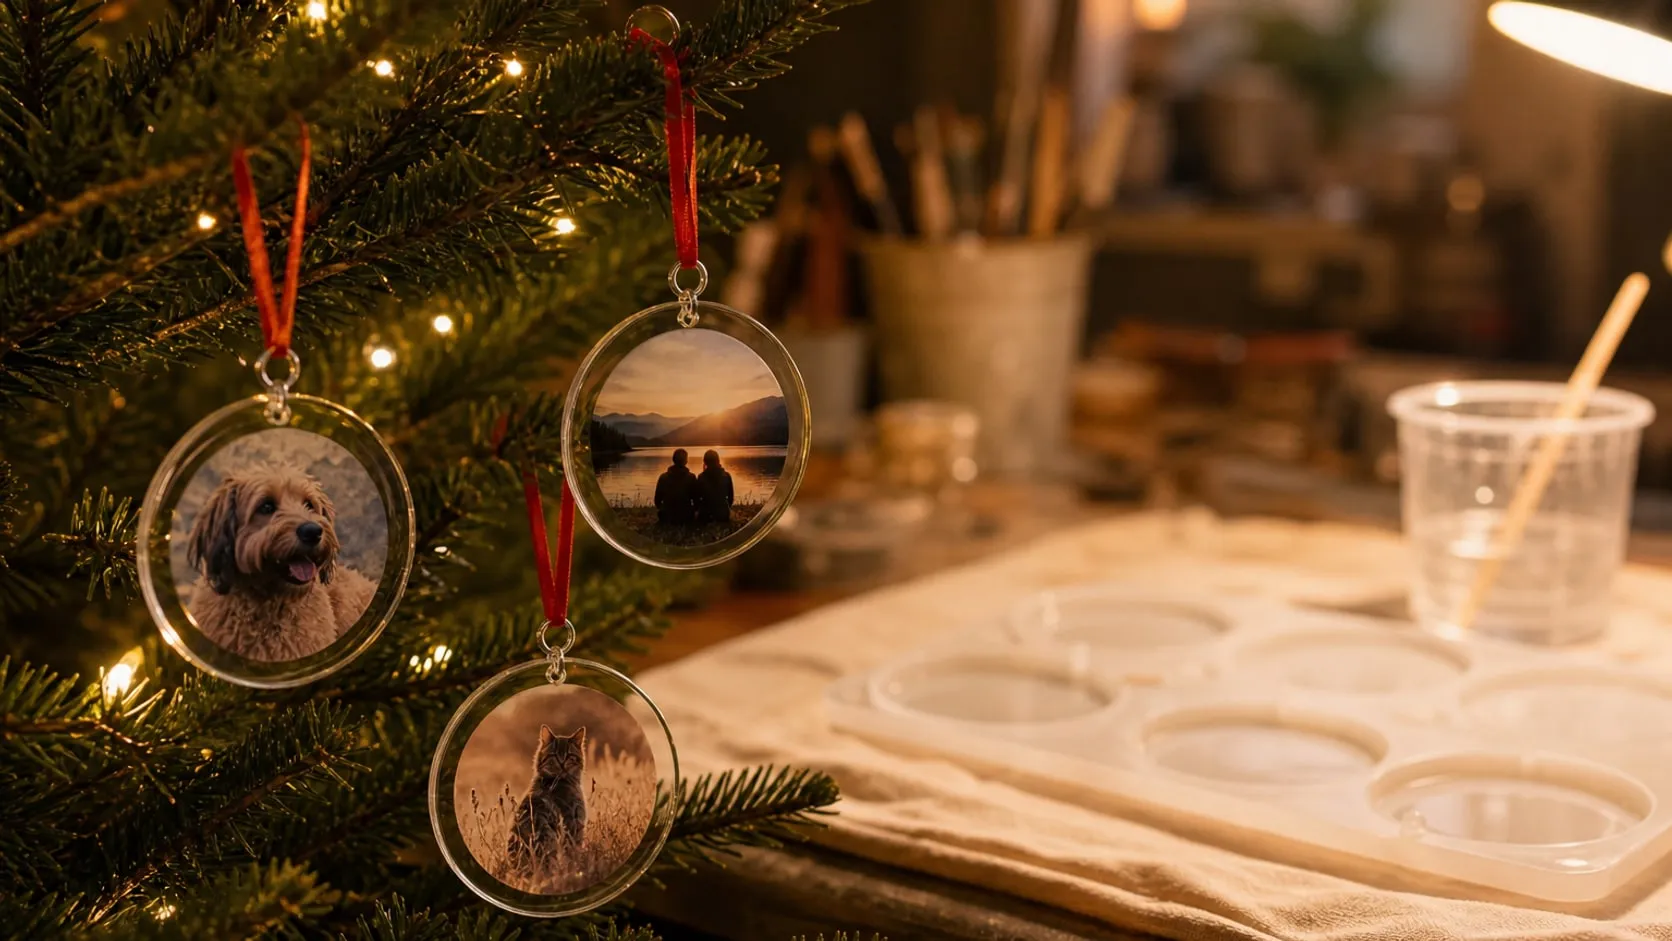
Photo ornaments are all over TikTok and Pinterest this season, and the appeal is easy to see: a picture of the kids, the dog or last summer’s trip, sealed in a clear disc that catches the tree lights. It looks like something from a gift shop, but it’s a weekend project with a mold and a kit of resin. One pour makes a whole batch, so the grandparents, the godparents and the neighbors all get one. Here’s the process, with the tools for each step below.
Step 1: Pick and print the photos
The ornament is small, so the photo has to read at a glance.
- One subject, close up. A face or a pet filling the frame works; a group photo turns into tiny dots at 2 in across.
- Bright and sharp. Resin slightly darkens and warms a print, so lean toward a lighter photo.
- Size it to the cavity, minus a margin. For the 2.95 in (75 mm) cavity, print the photo as a circle about 2.4 in (60 mm) across. The hanging hole sits near the edge, and the photo must stay clear of it.
- Print on vinyl, not paper. Plain paper soaks up resin and goes blotchy. Print at your best photo setting, and print two of each if you want a picture on both sides.
- Use photos you have the right to use, and if the ornament is for sale, make sure the people in it agree.
Let inkjet prints dry for a full day before the next step.
Step 2: Cut and seal the prints
- Cut the circles with sharp scissors or a cutting machine. A round object such as a jar lid makes a good template.
- For a two-sided ornament, peel the backing off one print and press the second one onto it back to back, lining the edges up exactly. Smooth out every air bubble with a fingernail; trapped air shows as a silver spot.
- Seal everything, front, back and especially the cut edge, with a thin brushed coat of decoupage sealer. Let it dry, then add one or two more thin coats.
- Dry overnight. Any moisture left in the sealer turns cloudy under resin.
Step 3: Set up the room and yourself
- A level table, covered with a plastic sheet or silicone mat. A tilted mold gives a wedge-shaped ornament.
- A warm room. The resin below wants 75–85 °F (24–29 °C) to cure properly. In a cold room it stays tacky.
- Fresh air. Open a window and let a fan push air out of the room. Most craft epoxies are low-odor, not no-odor.
- Gloves, long sleeves and safety glasses from the moment the bottles are opened.
- No kids or pets in the room until the resin is hard. Kids can choose the photos and cut the circles, but the resin itself is an adult job.
Step 4: Measure and mix
One 2.95 in ornament, 1/4 in deep, takes about 1 oz (30 ml) of mixed resin. Pour the ornaments in a batch rather than one at a time: small amounts are hard to measure accurately.
- Measure equal volumes of resin and hardener in separate cups, using the milliliter scale. For four large ornaments, about 60 ml of each, split over the two layers in Step 5. The kit below mixes 1:1 by volume; other resins don’t, so follow your label exactly.
- Pour both into a third cup and stir slowly for the full time on the label (three minutes for this kit), scraping the sides and bottom. Unmixed resin from the cup wall leaves soft, sticky spots.
- Work promptly. A fast-curing resin thickens sooner than a standard one, so mix only what you’ll pour in the next few minutes.
Step 5: Pour in two layers
In a silicone mold, the bottom of the cavity becomes the front of the ornament. So the clear layer goes in first, the photo goes in face down on it, and resin covers the back.
- Clear front layer. Pour a thin layer, about 1/16 in (2 mm), into each cavity. Make sure the resin flows around the pin that forms the hanging hole. Pop surface bubbles by breathing lightly through a straw or with a few seconds of warm air from a heat tool. No torch or lighter on a silicone mold.
- Wait until it’s tacky. After a while (with a fast resin, often within an hour or two, depending on the room), the edge should feel sticky but firm to a gloved fingertip. This keeps the photo from sinking to the front or sliding off center.
- Place the photo. Spread a drop of fresh resin on the face of the print, lower it face down from one edge so no air gets trapped, and press it flat with a stir stick. Check that it’s centered and away from the hole.
- Fill. Mix a second batch and pour it over the back of the photo, up to the top of the cavity. Pop the bubbles again.
Step 6: Cure, demold and hang
Cover the mold with an upturned box to keep dust off and leave it alone. LET’S RESIN gives this resin about 4 hours to demold and 8–10 hours to cure fully at 75–85 °F. In a cooler room, give it longer; if the back still dents under a fingernail, wait another day.
- Demold by peeling the silicone back from the edge all the way around, then pushing gently from below.
- Clean the edge. If the rim on the back is sharp, sand it lightly with fine wet sandpaper (400–600 grit), wearing a dust mask. Resin dust shouldn’t be breathed in.
- Hang it. Twist a jump ring through the molded hole and add a ribbon or an ornament hook. A spare small casting of the same photo, on a key ring, makes a matching second gift.
A few safety notes: let leftover resin harden in the cup before throwing it away, and never pour liquid resin down a drain. Epoxy slowly yellows in direct sun, so the ornament is happier on the tree than on a sunny window.
What it costs in time: an evening to choose and print photos, a day for the ink and another night for the sealer, about an hour of actual resin work over an afternoon, and a night of curing. Start a week before you need the gifts. The tools for each step are below.
At a glance
7 picksAs an Amazon Associate I earn from qualifying purchases. If you buy through a link on this page we may earn a small commission, at no extra cost to you. How this works.
JOYEZA Printable Vinyl Sticker Paper, Matte, 25 Sheets
Printable vinyl that won't soak up resin the way paper does.
The photo is the part that can ruin a resin ornament. Ordinary paper soaks up liquid resin and turns dark and translucent in patches. Vinyl doesn’t absorb, so once it’s sealed it stays the way it came out of the printer.
The sticky back is a bonus for ornaments: print the same photo twice, or two different ones, and press them back to back. The ornament then has a picture on both sides instead of a white back.
Pro tip Print at your printer’s best photo setting and give inkjet ink a full day to dry before you seal it. Print a few extra copies in different sizes; the first test ornament is the one that tells you how dark or light the photo looks under resin.
Why we like it
- ✓Vinyl, not paper, so it doesn't soak up resin and go blotchy the way plain paper does
- ✓Self-adhesive back — two prints stick back to back for a photo on both sides of the ornament
- ✓Works in inkjet and laser printers, per JOYEZA
- ✓Standard 8.5 × 11 in sheets; many ornament-size photos fit on one sheet
- ✓Easy to cut with scissors or a Cricut-style cutter
Keep in mind
- !Matte finish — the photo looks softer than on glossy photo paper until the resin covers it
- !Water-resistant, not waterproof; JOYEZA itself recommends a sealer, and inkjet prints still need sealing before resin
- !Image quality depends on your printer, not the vinyl
- Material
- Self-adhesive printable vinyl
- Finish
- Matte white
- Sheet size
- 8.5 × 11 in (Letter)
- Sheets
- 25
- Printers
- Inkjet and laser
Mod Podge Gloss Sealer, Glue & Finish, 16 oz
Thin coats seal the print and its cut edge before the pour.
A sealer between the print and the resin keeps the ink where it is. Without it, liquid epoxy can soften inkjet ink at the edges or creep into the cut edge of the print and leave a dark halo. A thin brushed coat on the front, the back and especially the cut edge closes all of that off.
Mod Podge is easy to find, a bottle covers dozens of test prints, and it washes off brushes with water. For this project it’s only a barrier, so the gloss finish doesn’t need to be perfect; the resin on top does the shine.
Pro tip Brush the first coat lightly and let it dry before adding more. A heavy first coat can make inkjet ink run. Two or three thin coats, then a night of drying, is the safe order before any resin touches the photo.
Why we like it
- ✓Glue, sealer and finish in one bottle
- ✓Water-based, cleans up with soap and water
- ✓Dries clear with a gloss finish
- ✓Works on paper, wood, plastic and fabric, per Plaid
- ✓16 oz lasts for far more ornaments than one holiday season needs
Keep in mind
- !Has to dry fully before the resin goes on, which adds a day to the project
- !Thick coats can stay cloudy or show brush marks — several thin coats work better
- !Water-resistant, not a waterproof topcoat on its own
- Type
- Water-based sealer, glue and decoupage finish
- Finish
- Gloss
- Size
- 16 fl oz (473 ml)
- Surfaces
- Paper, wood, canvas, fabric, plastic, terra cotta, tin
- Model
- CS11202
- Made in
- USA
TitanFlex Black Nitrile Exam Gloves, 6 mil, 100 Count
Heavy 6 mil nitrile between your hands and liquid epoxy.
Epoxy resin and hardener are skin sensitizers: one splash is rarely a problem, but repeated contact can cause an allergy that comes back with every later project. Gloves go on before the bottles open and come off only after the cups and sticks are in the trash.
The resin kit comes with two pairs, which is not enough for an afternoon of pouring. Gloves get changed every time resin lands on them, so a box of a hundred is the realistic amount.
Pro tip Peel a dirty glove off inside out and put on a fresh one rather than wiping it. If resin gets on your skin, wash it off with soap and water, never with alcohol or solvents, which help it soak in.
Why we like it
- ✓6 mil nitrile, twice as thick as typical thin disposable gloves
- ✓Latex-free and powder-free
- ✓Textured fingers for grip on cups, bottles and wet molds
- ✓Sizes S to XXL on the same listing
Keep in mind
- !Wrist-length at 9.5 in — wear long sleeves for the pour
- !Thicker nitrile means a little less fingertip feel for placing a small photo
- !This link is size Large; pick your size on Amazon
- Material
- Nitrile, latex- and powder-free
- Thickness
- 6 mil
- Length
- 9.5 in (24 cm)
- Grip
- Textured fingers
- Count
- 100
- Model
- HD20K03
TCP Global 10 oz Graduated Plastic Mixing Cups, Box of 50
Graduated clear cups and sticks, a fresh set for every batch.
Resin projects use a surprising number of cups: one for part A, one for part B, one to mix in, and a fresh one for every new batch. A box of fifty means you never scrape a half-cured cup to reuse it.
The printed milliliter scale is what matters for a 1:1 resin: fill one cup to a line with resin, another to the same line with hardener, then pour both into a third and stir.
Pro tip Very small batches are where measuring goes wrong. Mix at least 2 oz (60 ml) at a time, enough for two or three ornaments, and keep a spare cavity ready for the leftover rather than mixing a tiny amount for one piece.
Why we like it
- ✓Milliliter scale plus 2:1, 3:1 and 4:1 ratio marks printed on the side
- ✓50 cups and 50 wooden mixing sticks in the box
- ✓Clear PET, so you can see unmixed streaks through the wall
- ✓Flexible — cured leftover resin can often be cracked out of the cup
Keep in mind
- !No 1:1 marks; measure equal milliliters on the scale instead
- !10 oz is big for a one-ounce ornament batch, and small amounts are harder to read
- !Not meant for storing anything, per TCP Global
- Capacity
- 10 oz (300 ml)
- Count
- 50 cups + 50 wooden sticks
- Scales
- ml, ratios 2:1, 3:1, 4:1
- Material
- PET plastic
- Model
- TCP MC-F10-50PK
LET'S RESIN Fast Cure Clear Casting Epoxy Resin Kit, 72 oz
A 1:1 fast-curing epoxy made for thin pours like these.
Most craft epoxies need a full day before a piece can leave the mold. This one is formulated to set faster, and it’s meant for exactly the small, flat castings that ornaments and pendants are. A thin pour doesn’t build up much heat, which is what makes a fast formula practical here.
The trade-off is working time. Mix only what you can pour in the next few minutes, and do the slow parts, like sealing photos and cleaning the mold, before the bottles are opened.
Pro tip If the resin looks cloudy in the bottle, it’s usually just cold. LET’S RESIN suggests warming the closed bottles in warm water before mixing. Dry them completely before opening; a drop of water in the mix shows up as a cloudy spot in the ornament.
Why we like it
- ✓Simple 1:1 mix by volume, stirred for 3 minutes
- ✓LET'S RESIN gives about 4 hours to demold and 8–10 hours to full cure, so an evening pour is ready the next day
- ✓Sold for small, shallow pours such as pendants and keychains
- ✓Kit includes measuring cups, small cups, pipettes, two pairs of gloves and six liquid dyes
- ✓The maker describes it as low-odor and yellowing-resistant
Keep in mind
- !Made for thin pieces — not a deep-pour resin for thick castings
- !Fast resin leaves less time to work, so mix small batches
- !72 oz is far more than a few ornaments need, and the listing gives a one-year shelf life
- !Stays tacky in a cold room; the maker wants 75–85 °F (24–29 °C) for curing
- Contents
- 36 oz resin + 36 oz hardener
- Mix ratio
- 1:1 by volume
- Stirring
- 3 minutes, slowly
- Demold
- About 4 hours (per the maker)
- Full cure
- About 8–10 hours at 75–85 °F (per the maker)
- Included
- 10 × 8 oz cups, 20 small cups, 5 pipettes, 2 stir sticks, 2 pairs of gloves, 6 dyes
- Model
- ALR00106
LET'S RESIN Round Keychain Resin Molds with Hole, 21 Cavities
Flat round cavities up to 2.95 in, with the hanging hole molded in.
A photo ornament is a flat disc, and a flat round mold with the hole already in it removes the fiddliest part of the job. Drilling cured resin near the edge of a thin disc can crack it; here the hole is cast in place.
At 0.25 in deep, the largest cavity holds only about an ounce of mixed resin, so a set of ornaments uses very little. The smaller sizes suit gift tags or a matching keychain with the same photo.
Pro tip Wash the mold with mild soap, let it dry fully and lift any dust off the bottom with a piece of tape before pouring. In this kind of mold, the bottom of the cavity becomes the front of the ornament, right over the photo.
Why we like it
- ✓Four sizes, from 1.97 to 2.95 in (50–75 mm) across, in the same set
- ✓A hanging hole is built into every cavity, so the ornament needs no drilling
- ✓0.25 in (6 mm) deep — a thin, light ornament that hangs well on a branch
- ✓Glossy interior for a shiny, glass-like front
- ✓21 cavities, enough for a whole batch of gifts in one pour
Keep in mind
- !Only four cavities each of the three larger sizes; nine are the smallest 1.97 in size
- !The hole sits close to the edge, so the photo has to be cut smaller than the cavity
- !LET'S RESIN says the cavities are too big for earrings, in case you hoped to make matching jewelry
- Cavities
- 21 round (4 × 2.95 in, 4 × 2.76 in, 4 × 2.36 in, 9 × 1.97 in)
- Diameters
- 75, 70, 60 and 50 mm
- Depth
- 0.25 in (6 mm)
- Hanging hole
- Built in
- Material
- Silicone, glossy interior
- Model
- LPR-3234
Flasoo Resin Keychain Hardware Kit, 360 Pieces
Jump rings for the ornament hole, key rings for the spare castings.
A ribbon through the molded hole works, but a small metal ring between the ornament and the ribbon looks finished and lets the ornament turn freely on the branch. Open the jump ring sideways with two pliers, slip it through the hole, and close it the same way.
The kit is sold for keychains, which is useful here too: the smallest cavities of a round mold, poured with the same photo, become a keychain to go with the ornament.
Pro tip Open jump rings by twisting the ends apart front to back, not by pulling them open into a C. A twisted ring closes back into a clean circle; a pulled one never quite does.
Why we like it
- ✓120 open jump rings, 120 screw eye pins and 120 key rings with chain
- ✓3/8 in (8 mm) jump rings fit through a molded ornament hole
- ✓Screw eye pins for pieces cast without a hole
- ✓The key rings turn the small castings into matching keychains
Keep in mind
- !Iron with nickel plating, not stainless — it can tarnish over time
- !Screw eye pins need a small pilot hole drilled into cured resin
- !Far more key rings than an ornament project uses
- Jump rings
- 120, 3/8 in (8 mm)
- Screw eye pins
- 120, 5/8 × 1/4 in (10 × 5 mm)
- Key rings
- 120, 1 in (25 mm) with 1 in chain
- Material
- Nickel-plated iron
- Model
- KB-01