DIY Heated Pet Bed With Thermostat Control
A pet-safe heating pad, a plug-in thermostat with its probe under the cover, a foam base and a washable fleece cover — a heated bed sized to your pet, in seven steps.
Published October 7, 2026 · 7 picks
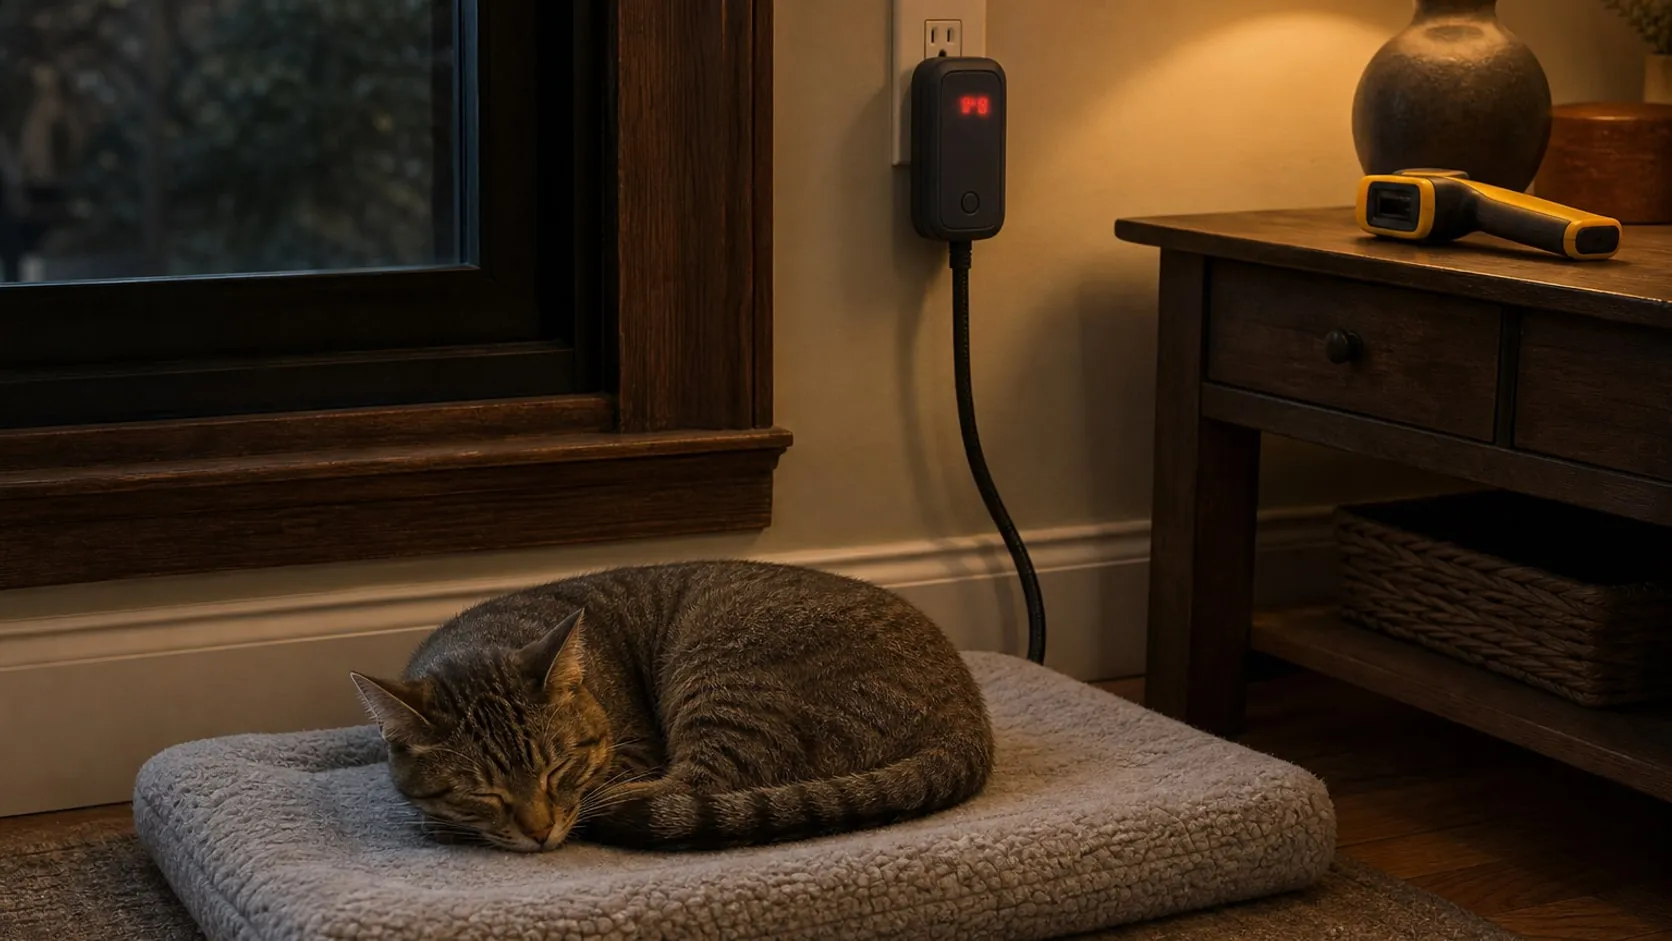
The first cold evenings bring the same scene to every house with a pet: the cat on the router, the old dog pressed against the radiator. A heated bed fixes that, and store-bought ones are fine, but they come in a few sizes and none of them can tell you how warm the surface under your animal actually is. This build can. It wraps a pet-safe heating pad in a foam base and a washable fleece cover cut to your pet’s size, and adds a second thermostat that measures the surface itself and cuts the power the moment it passes the number you choose. Here’s the whole build, step by step, with the parts for each step below.
Step 1: Plan the size and the temperature
Two decisions before you buy anything.
- Make the bed bigger than the heat. Vets’ advice on heated beds comes down to one rule: the animal must be able to move off the warm part on its own. Plan the base so the pad covers about half of it. For a cat or a small dog, a 12 × 16 in pad in a 20 × 28 in bed; for a medium dog, a 16 × 20 in pad in a 24 × 36 in bed.
- Pick a target. Pet pads are built to run around body temperature; MARUNDA rates the pad below at 95–108°F (35–42°C). A set point of 100°F (38°C) at the surface is a sensible start, and the thermostat lets you move it a degree at a time, never above the pad maker’s range.
- Use a pad made for pets, not a human heating pad. Human pads run hotter and aren’t built for hours under a body that can’t tell you it’s too warm.
- Ask your vet first for a newborn, a very old or a sick animal, or one recovering from surgery. If it can’t get up and move away on its own, a heated surface is a risk, not a comfort.
Step 2: Cut the foam base
Mark the base on the 2 in foam sheet with a straightedge and a marker, then cut it with a long serrated bread knife or an electric carving knife, keeping the blade upright so the edge comes out square. Firm foam matters: it keeps the pad flat, which every pad maker asks for, and it puts two inches of insulation between the pad and a cold floor, so the heat goes up into the animal instead of down into the tiles.
One 24 × 72 in sheet gives you a cat bed and a dog bed with foam to spare, or two 24 × 36 in dog beds exactly.
Step 3: Place the heating pad
Lay the pad flat on the foam, pushed toward one end rather than centered, so the other end of the bed stays unheated. Don’t cut a pocket for it: the fleece cover holds it in place, and a pad in a recess traps heat. Run the cord off the back edge of the bed, the side that will face the wall.
The pad in the picks has no switch, timer or controller on its cord. That isn’t a shortcut; it’s the point. The thermostat in the next step works by cutting the pad’s power and giving it back many times a night, and a pad with a touch controller or an auto-off timer may stay off after the first cut. If you use a different pad, pick one that heats the moment it’s plugged in.
Step 4: Set up the thermostat
- Plug the controller into a wall outlet and the pad into its heating socket. Leave the cooling socket empty.
- Place the probe. Tape the steel probe flat on top of the pad, in the middle of the heated area, with a strip of cloth tape. It sits between the pad and the fleece, so it reads the surface the animal lies on. Never put it under the pad or at the edge.
- Set the numbers. On the ITC-308 that’s the set temperature (TS), the heating differential (HD) and the two alarms (AH and AL). Start with a set point of 100°F, a differential of 2°F, a high alarm at 105°F and a low alarm at 85°F.
The differential means the pad switches off at 100°F and back on at 98°F. The high alarm is your runaway warning. The low alarm does something less obvious: if the probe ever slips out of the bed, it reads the room, drops under 85°F, and the buzzer tells you, instead of letting the pad run on its own thermostat all night. It may also sound for a few minutes while a cold bed warms up.
Step 5: Sew the cover
A pillowcase with a hook-and-loop mouth is all it is, and fleece makes it forgiving: no fraying, no hemming.
- Cut two panels, each the base’s length and width plus its thickness plus 1 in. For a 20 × 28 × 2 in base, that’s 23 × 31 in.
- Sew three sides. Pin the panels together, right sides in, and sew around three sides with a ½ in seam. A backstitch by hand works; a machine does it in ten minutes.
- Add the closure. Turn the cover right side out. On the open end, sew the hook strip along the inside of one panel and the loop strip along the inside of the other, ½ in from the edge.
- Stuff it. Slide in the foam with the pad and probe on top, lead the cord and the probe lead out through one corner of the mouth, and press the closure shut.
Two yards of fleece is enough for this cover and a spare, which is what makes the bed washable: swap the cover, wash it, done. Keep it to one layer over the pad. A blanket folded on top traps more heat under the animal than either thermostat can see.
Step 6: Route and protect the cords
The pad’s cord is wrapped in steel. The controller’s cords and the thin probe lead are not, and a probe lead is precisely the kind of dangling thing a cat hunts. Bundle the pad cord and the probe lead into the split braided sleeve from the mouth of the cover to the controller, run it along the baseboard, and hang the controller on the wall by its slot, high enough that you can read it and the pet can’t reach it. Plug the controller into a wall outlet, not into a power strip lying behind the bed.
A chew sleeve is a deterrent, not armor. If your pet is a serious chewer, the bed goes where the cords are out of reach behind furniture, and the pad gets unplugged when nobody’s home.
Step 7: Test, then watch the first week
- Run it empty. Cover on, nobody on the bed, an hour. Sweep the infrared thermometer across the cover from about 14 in away and note the hottest spot. The fleece over the pad should read near the set point and the unheated end near room temperature.
- Check with the pet on it. The controller shows the measured temperature next to the set point. With the animal lying on the probe it should cycle a couple of degrees around the number you chose. If it reads higher, lower the set point; if the pet keeps leaving after a few minutes, it’s too warm for them, whatever the number says.
- Watch the first week. Does the pet choose the warm end or the cool one, stay the night or leave, pant or stretch out? The bed is right when they move between the two ends on their own.
- Inspect monthly. Unplug it, pull the cover, and check the pad for cracks and the cords for bite marks. A damaged pad is replaced, not taped.
Before you travel: a pet sitter can’t read a thermostat they don’t know. Leave the controller where it’s visible, put the set point on a tape label next to it, and show them what the alarm sounds like. If nobody will be home for long stretches, unplug the bed and leave the cover on; the foam and fleece are still a good bed without the heat.
What it costs in time: an evening for cutting the foam and sewing the cover, an hour for the thermostat and the cords, and a week of watching. The parts for each step are below.
At a glance
7 picksAs an Amazon Associate I earn from qualifying purchases. If you buy through a link on this page we may earn a small commission, at no extra cost to you. How this works.
GoTo Foam 2 in Firm Upholstery Foam, 24 × 72 in
A firm 2 in slab cut to size, flat under the pad and bigger than the heat.
The base does two jobs. It keeps the heating pad flat, which every pad maker asks for, and it puts two inches of foam between the pad and a cold floor, so the heat goes up into the animal instead of down into the tiles. Firm foam is the right choice here: a soft slab lets a heavy dog sink until the pad bends.
One sheet is enough for a cat bed and a medium dog bed, or two 24 × 36 in dog beds with nothing left over. Mark the cut with a straightedge and go through it with a long serrated knife or an electric carving knife; a short blade wanders and leaves a ragged edge.
Pro tip Polyurethane foam drinks up anything spilled on it. Keep the waterproof pad on top where the pet lies, use a washable cover, and if your pet is a leaker, add a waterproof mattress protector between foam and cover.
Why we like it
- ✓24 × 72 in sheet: a cat bed and a dog bed with foam to spare, or two 24 × 36 in beds exactly
- ✓Firm (43 ILD) at 1.8 lb density, so a heavy dog doesn't sink until the pad bends
- ✓CertiPUR-US certified, made in the USA
- ✓Cuts cleanly with a long serrated knife or an electric carving knife
- ✓Thicknesses from 1 to 6 in on the same listing
Keep in mind
- !Open-cell polyurethane soaks up liquids; it needs the waterproof pad on top and a washable cover around it
- !2 in firm is supportive rather than plush; an old dog with sore joints may prefer the 3 or 4 in version
- !Ships rolled, as in the listing photo; let it relax flat before you cut
- Size
- 24 × 72 × 2 in
- Firmness
- 43 ILD (firm)
- Density
- 1.8 lb/ft³
- Material
- Polyurethane upholstery foam, CertiPUR-US certified
- Weight
- 3.56 lb
- Made in
- USA
MARUNDA Pet Heating Pad, 12 × 16 in
A pet pad with its own thermostat, a steel cord and nothing on the cord to reset.
A heated bed starts with a pad that was made to have an animal lie on it for hours: a low, regulated surface temperature, a waterproof skin and a cord a bored cat can’t get into. This one has all three, and one more thing that matters for this build: nothing to press. There is no controller or timer on the cord, so when the thermostat in Step 4 cuts the power and gives it back, the pad simply starts heating again.
MARUNDA says the built-in thermostat holds the pad between 95 and 108°F. That’s the first safety layer; the plug-in thermostat with its probe on the surface is the second, and it lets you pick the number. The listing gives no voltage or wattage, so treat it as a mains appliance, not a 12 V one, and take the cord routing in Step 6 seriously.
Pro tip Keep the pad flat and never fold it or bury it under a blanket. One layer of fleece on top is all the bed needs; every extra layer traps more heat under the animal than the pad’s own thermostat can see.
Why we like it
- ✓Built-in thermostat holds the pad at 95–108°F (35–42°C), per MARUNDA
- ✓Cord is wrapped in steel against chewing
- ✓IP67 waterproof PVC pad with a removable, machine-washable cover
- ✓No buttons, timer or app, so it starts heating the moment a plug-in thermostat gives it power
- ✓Two sizes on the listing, 12 × 16 in (this link) and 16 × 20 in
Keep in mind
- !Plugs straight into a wall outlet; the listing gives no wattage or voltage, and it is not a 12 V pad
- !No switch, so it is on whenever it has power — which is exactly why the external thermostat matters
- !12 × 16 in suits a cat or a small dog; a medium dog needs the 16 × 20 in version
- Size
- 12 × 16 in (S); 16 × 20 in (M) on the same listing
- Temperature
- 95–108°F / 35–42°C, built-in thermostat
- Pad
- IP67 waterproof PVC
- Cover
- Removable, machine washable
- Cord
- Steel-wrapped, chew resistant
- Max pet weight
- 40 lb
- Model
- TT102
Inkbird ITC-308 Temperature Controller
A plug-in controller that switches the pad from the surface temperature, with an alarm.
A pet pad’s own thermostat measures the pad. What matters is the surface your animal lies on, under the cover, and that is what this controller measures. The pad plugs into its heating socket, the probe is taped on top of the pad, and the controller switches the pad off at the temperature you set and on again when the surface drops by the differential you choose.
It’s the same box home brewers and reptile keepers use, which is why it has a buzzer. Set a high alarm a few degrees above the set point and a low alarm a few degrees below it, and it tells you when something is off: a pad running away, or a probe that slipped out of the bed and is reading the room.
Pro tip Hang it on the wall by the slot at the top, at a height where you can read the display from the sofa and the pet can’t reach it. A controller lying on the floor behind the bed is one you’ll stop looking at.
Why we like it
- ✓Plug-and-play: wall plug on one end, heating and cooling sockets on the other, probe included
- ✓Shows measured and set temperature at the same time, in °F or °C
- ✓Buzzer alarm for high or low temperature and for a probe fault
- ✓Switches up to 1100 W at 110 V, far more than a pet pad draws
- ✓Dual relay: the cooling socket can run a fan for the same bed in summer
Keep in mind
- !The probe reads one spot; it has to sit where the pet lies, not at the edge of the bed
- !Setup is three buttons and a few two-letter menu codes; keep the manual for the first evening
- !This link is the non-Wi-Fi version; the Wi-Fi variant is a separate listing
- Load
- 1100 W max at 110 V
- Outputs
- Heating socket + cooling socket (dual relay)
- Display
- Dual window, measured + set temperature, °F/°C
- Alarm
- High/low temperature, sensor fault
- Probe
- Included
- Size
- 5.51 × 2.68 × 1.3 in
- Weight
- 1.1 lb
FabricLA Anti-Pill Polar Fleece, 60 in Wide, 2 Yards
Two yards of anti-pill fleece, a cover and a spare, no hemming needed.
Fleece is the easy fabric for a first sewing project. It doesn’t fray, so cut edges can stay raw; it stretches a little to go around a foam slab; and it goes through the washing machine without complaint. The 280 GSM weight is the heavier blanket grade, thick enough to hide the pad’s outline but thin enough to let its heat through.
Two yards at 60 in wide cuts into a cover for a 20 × 28 in bed and a second one for wash day, which is the whole point of a removable cover. Heather gray hides fur better than the light colors; the same listing has dozens of colors and cuts from a quarter yard up.
Pro tip Wash and dry the fleece once before you cut it. Fabric can shrink or relax a little on the first wash, and a cover sewn to size afterwards keeps fitting.
Why we like it
- ✓60 in wide × 72 in long: a cover for a 20 × 28 in bed and a second one from a single cut
- ✓280 GSM anti-pill polar fleece, the heavier blanket grade
- ✓Fleece doesn't fray, so cut edges can stay raw and nothing needs hemming
- ✓Machine washable
- ✓Dozens of colors and lengths from a quarter yard to 5 yards on the same listing
Keep in mind
- !Fleece holds pet hair and static; a lint roller becomes part of wash day
- !Claws will eventually pull loops out of any fleece; treat the cover as the part you replace, not the bed
- !This link is one color, Heather Gray; pick yours on Amazon
- Size
- 60 in wide × 2 yards (72 in)
- Weight
- 280 GSM
- Material
- Polar fleece, anti-pill
- Care
- Machine wash
- Color
- Heather Gray (this link)
VELCRO Brand Sew On Fabric Tape, ¾ in × 15 ft
Sew-on hook and loop opens one whole side for washing, with no zipper to fit.
A zipper is the classic closure for a cushion cover and the step most beginners stall on: the right length, a zipper foot, a dead-straight seam. Sew-on hook and loop skips all of it. Stitch the hook strip to one panel and the loop strip to the other along the open side, and the cover opens wide enough to pull the foam, pad and probe out in a few seconds.
It has to be the sew-on kind. Adhesive-backed tape lets go in the wash and gums up a needle; this is plain nylon tape you stitch through, by hand or by machine.
Pro tip Press the two halves together before every wash. An open hook strip in the machine collects fleece fuzz and fur until it stops gripping.
Why we like it
- ✓15 ft roll of hook and loop, enough for the closure on several covers
- ✓Sew on, no adhesive: it survives the washing machine, unlike sticky-back tape
- ✓¾ in wide, easy to run under a machine foot or stitch by hand
- ✓No zipper foot and no zipper length to match; cut it to the exact edge
Keep in mind
- !The hook side grabs fleece and pet hair; close it before every wash
- !White shows dirt on a gray cover; a black roll is on the same listing
- Size
- ¾ in × 15 ft
- Type
- Hook and loop, sew on (no adhesive)
- Material
- Nylon
- Color
- White (this link); black variant
Alex Tech ½ in Split Braided Cable Sleeve, 10 ft
A split braided sleeve for the cords between bed, thermostat and wall.
The pad’s cord comes wrapped in steel. The thermostat’s cords don’t, and neither does the thin probe lead, which is exactly the kind of dangling wire a cat likes. This sleeve is split along its length, so you wrap it over the cords after everything is plugged in, and it closes on itself with nothing to tape.
Half an inch is enough for the pad cord and the probe lead together from the bed to the controller. It makes a cord unpleasant and hard to bite into, but a determined chewer with time alone can still get through braided plastic. Routing along a wall and out of sight matters as much as the sleeve.
Pro tip Cut the sleeve a little long and wrap each end with a turn of electrical tape. The braid frays at a bare cut end, and the loose strands are what a kitten pulls on first.
Why we like it
- ✓Split along its length, so it goes over a cable that's already plugged in
- ✓Closes on itself once the wire is in, no tape needed
- ✓½ in fits the pad cord and the probe lead together
- ✓Rated for -103 to 257°F; UL recognized
- ✓10 ft; 25 ft rolls and other diameters on the same listing
Keep in mind
- !A deterrent, not armor: a determined chewer with time alone can get through polyethylene braid, so routing matters too
- !Cut ends fray; wrap them with a turn of electrical tape
- Size
- ½ in diameter × 10 ft
- Material
- Polyethylene, braided, split
- Temperature
- -103 to 257°F operating
- Listing
- UL recognized
- Color
- Black (this link)
Etekcity Lasergrip 774 Infrared Thermometer
Reads the cover's surface temperature in half a second, so you set the thermostat on facts.
Everything in this build is a claim until you measure it: the pad’s range, the thermostat’s set point, the fleece between them. An infrared thermometer settles it in half a second. Point it at the cover, pull the trigger and the backlit screen shows the surface temperature; hold the trigger and sweep, and the max readout keeps the hottest spot.
Infrared reads surfaces, not air and not animals. Measure the fleece, not the bare PVC pad or a metal bowl, because shiny surfaces read low, and don’t use it as a thermometer for your pet. After the bed, it earns its place on the griddle, the radiator and the drafty window.
Pro tip Measure from the distance Etekcity recommends, about 14 in. The 12:1 ratio means a spot roughly an inch across at that distance; from across the room you’re averaging the bed with the floor around it.
Why we like it
- ✓Reads -58 to 842°F (-50 to 450°C) in about 0.5 s
- ✓12:1 distance-to-spot ratio; Etekcity recommends measuring from about 14 in
- ✓Backlit LCD with a max-temperature readout, so a slow sweep shows the hottest spot
- ✓Auto off, 2 AAA batteries included, 2-year warranty
Keep in mind
- !Reads surfaces only: it's not a thermometer for your pet and it won't read air temperature
- !Shiny surfaces (the bare PVC pad, a metal bowl) read low; measure on the fleece
- !The laser is a pointer, not the measurement; keep it away from eyes, yours and the pet's
- Range
- -58 to 842°F / -50 to 450°C
- Distance to spot
- 12:1
- Response
- 0.5 s
- Display
- Backlit LCD, max reading
- Batteries
- 2 × AAA (included)
- Length
- 6.14 in
- Weight
- 4 oz