Patch & Epoxy Your Garage Floor For A Showroom Finish
Clean, grind, patch, coat and flake — a weekend method for a glossy garage floor that holds up to hot tires, plus the kit for each step.
Published October 10, 2026 · 6 picks
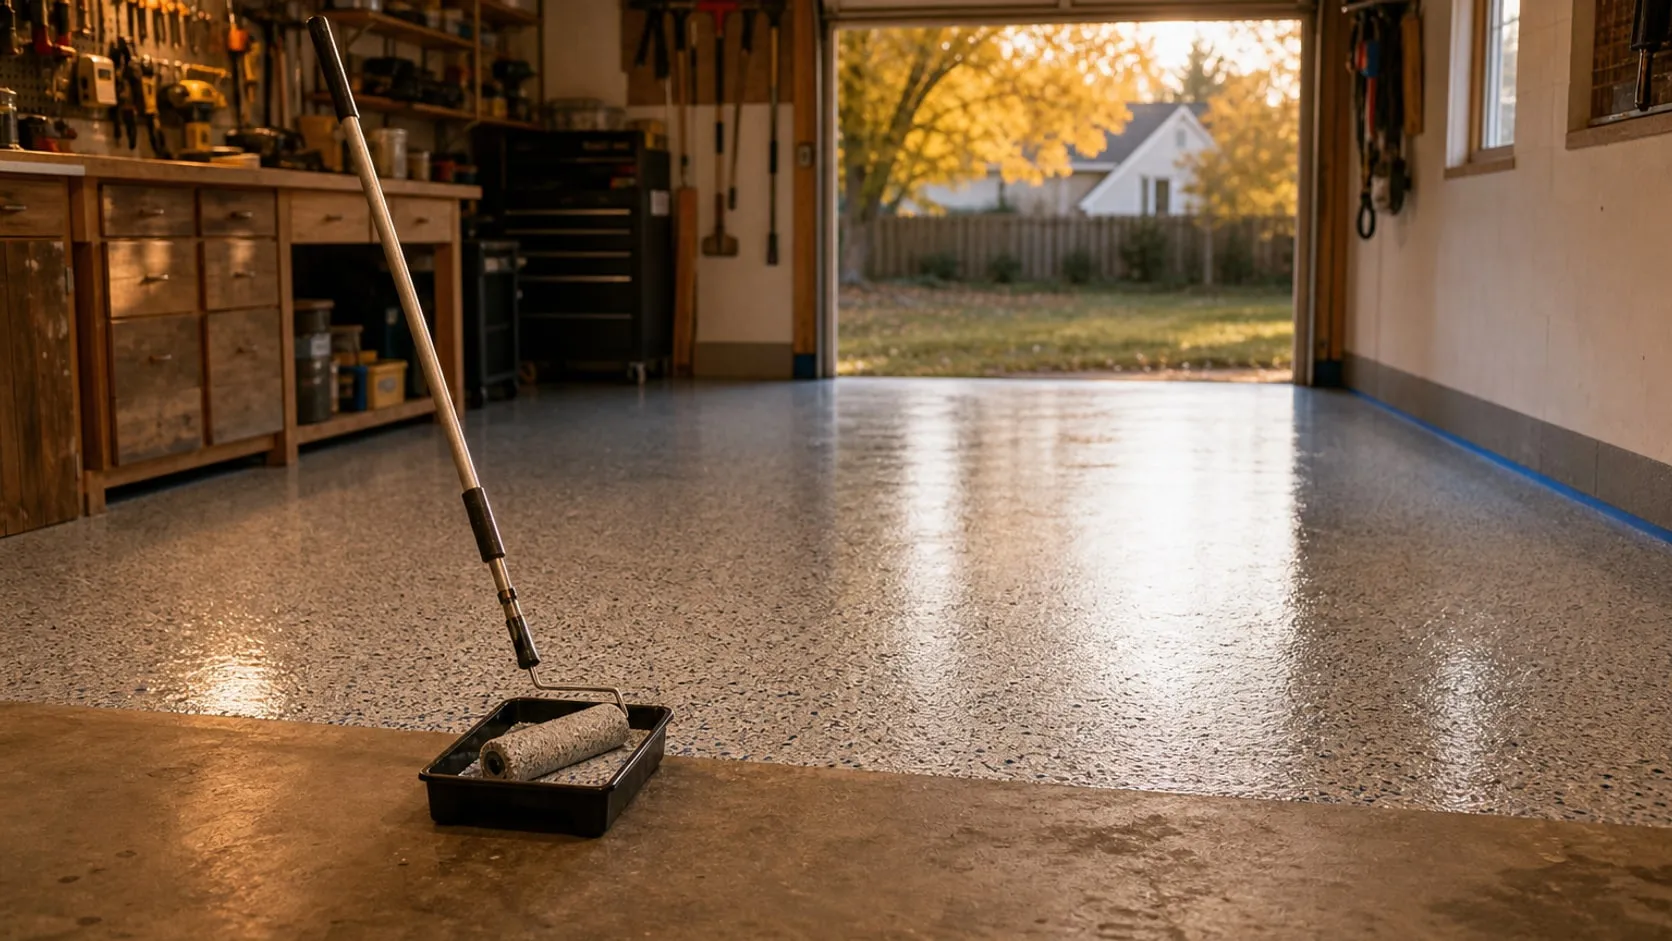
A coated garage floor is one of those projects that looks like a contractor job but fits into a weekend: one day of prep, one evening of coating, and a day of cure before the car goes back in. Fall is a good time for it, as long as the garage stays warm enough for the coating to cure. Almost every failure (peeling, hot-tire lift, bubbles) comes from skipped prep, so most of the steps below happen before you open the coating.
Step 1: Check the floor and the weather
- Moisture test. Tape an 18 × 18 in (45 × 45 cm) sheet of plastic to the bare floor and leave it overnight. If the concrete underneath darkens or the plastic is wet, moisture is coming up through the slab and the coating will lift. Don’t coat until that’s solved.
- Sealer test. Drip some water on the floor. If it beads instead of soaking in, the concrete is sealed or too smooth, and grinding (Step 3) isn’t optional.
- Temperature. Read the coating’s instructions for the minimum floor and air temperature, and check the forecast for the cure days too. Cold garages slow the cure a lot.
- Empty the garage completely, including the shelves near the floor. Everything that stays will collect dust.
Step 2: Degrease and clean
Sweep, then scrub oil spots and tire marks with concrete degreaser and a stiff brush, and rinse well. Old oil is the most common reason coatings peel in the exact spot where the car parks. Repeat on stubborn stains until water soaks in evenly. Wear chemical gloves and eye protection, and keep the big door open.
Step 3: Grind or etch the surface
The coating needs a rough, open surface, like 120-grit sandpaper to the touch.
- Grinding is the more reliable option. A diamond cup wheel on an angle grinder handles edges, high spots and small garages; for a full two-car floor, a walk-behind grinder from a rental shop is much faster. Use a dust shroud with a HEPA vacuum and a P100 respirator, because concrete dust contains silica.
- Etching works on bare, unsealed concrete. Most kits include an etcher: spread it with a broom, let it work, scrub, and rinse thoroughly. The floor must be completely dry before coating, usually overnight or longer.
Vacuum everything afterwards, then go over it again. Any dust left on the floor becomes a weak spot in the coating.
Step 4: Patch cracks and divots
Open hairline cracks with the grinder edge or a chisel so the filler can get in, vacuum them out, then fill with a two-part epoxy patch. Overfill slightly, and once it has cured, grind or sand it flush with the floor. A ridge of patch will show through a glossy coating. Leave control joints (the straight cut lines) open, or fill them with a flexible joint filler instead.
Step 5: Mix and roll the coating
Plan the order before you mix anything: start in the back corner farthest from the door and work out toward it. Cut in along the walls with a brush, then roll the open floor in sections of a few feet, keeping a wet edge so you don’t leave lap marks. Two-part coatings have a limited working time once mixed, so mix one batch at a time and don’t let it sit in the tray.
Wear the respirator and gloves while you work, and keep the door open for airflow. Spiked shoes let you walk back onto the wet coating to fix a thin spot or reach the middle of the floor.
Step 6: Broadcast the flakes
While each section is still wet, throw the flakes up and let them fall onto the surface. A light sprinkle gives a subtle speckle; a heavy, full broadcast gives the dense showroom look and hides more imperfections. Do a test throw on a piece of cardboard first so you know how much to use, and keep a consistent rhythm so the floor looks even.
Step 7: Let it cure
Close the garage to people, pets and dust. Follow the coating’s walk-on and drive-on times. For RockSolid, Rust-Oleum lists 8–10 hours to walk on and 24 hours before driving on, and waiting longer in a cold garage is always the safer choice. Hot tires on a coating that hasn’t fully cured is what causes tire marks and lifting.
What it costs in time: a day for cleaning, grinding and patching, an evening for coating and flakes, and a day of cure before the car goes back in. The kit for each step is below.
At a glance
6 picksAs an Amazon Associate I earn from qualifying purchases. If you buy through a link on this page we may earn a small commission, at no extra cost to you. How this works.
Rust-Oleum RockSolid Polycuramine Garage Floor Kit (2.5 Car, Gray) + Concrete Patch & Cleaner/Degreaser
Degreaser, crack filler and a two-part polycuramine coating in one order.
A garage floor coating fails at the prep, not at the roller. Oil spots, old tire marks and open cracks are where it peels first, so having the degreaser and crack filler in the same order as the coating makes it easier to do the steps in the right sequence instead of skipping them.
RockSolid is Rust-Oleum’s polycuramine coating: two parts sealed in one pouch that you burst and knead to mix, then roll on in sections. Rust-Oleum says it’s 20× stronger than epoxy and drive-on ready in a day, which makes it a practical choice when the car can only be out of the garage for a weekend.
Pro tip Tape a sheet of plastic to the bare concrete overnight before you start. If the underside is wet or the concrete under it darkens in the morning, moisture is coming up through the slab and no coating will hold. Fix that first.
Why we like it
- ✓Bundle covers three steps — degrease, patch, coat
- ✓Polycuramine coating in two-part burst pouches, mixed without measuring
- ✓Rust-Oleum lists it as walk-on ready in 8–10 hours, vehicle ready within 24 hours
- ✓Two-part epoxy patch for cracks and holes; coatable after 8 hours per the listing
- ✓Low-odor, low-VOC formula
Keep in mind
- !Short working time once a pouch is mixed — prep everything before you burst the first one
- !The listing's coverage figure doesn't match the box; measure your floor and check before buying
- !Not for floors with moisture coming up through the slab
- Coating
- Polycuramine, two-part, high gloss
- Color
- Gray
- Kit size
- 2.5 car
- Walk on
- 8–10 hours (per Rust-Oleum)
- Drive on
- within 24 hours (per Rust-Oleum)
- Patch
- Two-part epoxy, 24 fl oz
- Cleaner
- Concrete cleaner & degreaser, 1 gal
- Use
- Interior concrete
SHOWA CHM Neoprene Chemical Resistant Gloves, 26 mil, 12 in, Large (12 Pairs)
Long-cuff chemical gloves for degreaser, etch and wet coating.
Floor prep is a wet job: degreaser scrubbed into concrete, etching solution spread with a broom, then a two-part coating that sticks to skin as well as it sticks to concrete. Thin disposable gloves tear on rough concrete and let liquid run in at the wrist, which is where a heavy, long-cuff glove makes more sense.
The CHM is a neoprene-over-latex glove with a long cuff, and SHOWA describes it as resistant to a broad range of chemicals. Twelve pairs means a fresh pair for each stage rather than pulling coating-covered gloves back on.
Pro tip Tuck the glove cuffs over your sleeves when you’re working at floor level, and under them when you’re reaching up. Either way, liquid runs off the glove instead of into it.
Why we like it
- ✓Neoprene over natural rubber, 26 mil thick
- ✓12 in cuff keeps splashes off the wrists
- ✓Cotton flock lining, textured grip
- ✓Wear-indicator layer shows when the outer coat is worn through
- ✓12 pairs in the pack
Keep in mind
- !Contains natural rubber latex — not for anyone with a latex allergy
- !Thick gloves cost dexterity on small tasks
- Material
- Neoprene over natural rubber latex
- Thickness
- 26 mil
- Length
- 12 in
- Liner
- Cotton flock
- Pack
- 12 pairs
- Size
- Large (other sizes on the listing)
- Model
- CHM
KSEIBI 644030 Diamond Cup Grinding Wheel, 4-1/2 in, Double Row
Opens up smooth, sealed concrete so the coating has something to grip.
Coatings stick to concrete by gripping a rough, open surface. Garage slabs are usually troweled smooth and often sealed, so the coating has nothing to hold onto. Grinding opens up the surface more reliably than acid etching, and it also takes off old paint and sealer that etch can’t touch.
A diamond cup wheel on an angle grinder is the small-scale version of a floor grinder. It’s well suited to edges, corners, high spots around cracks, and one-car garages if you have the patience. For larger floors, it pairs well with a rented walk-behind grinder for the open area.
Pro tip Grinding concrete makes fine silica dust. Use a shroud connected to a vacuum with a HEPA filter, wear a P100 respirator, and keep the wheel moving so it doesn’t dig a groove.
Why we like it
- ✓Two rows of brazed diamond segments for faster material removal
- ✓Fits standard 4-1/2 in angle grinders; extra 25/32 in reducer ring included
- ✓Rated to 12,500 RPM
- ✓Works wet or dry
- ✓Also removes old coatings, glue and thinset
Keep in mind
- !Needs an angle grinder, a dust shroud and a vacuum — none included
- !A 4-1/2 in wheel is slow on a full two-car floor; rent a floor grinder for big areas
- Diameter
- 4-1/2 in
- Segments
- Double row, 5 mm tall
- Arbor
- 7/8 in, with 25/32 in reducer ring
- Max speed
- 12,500 RPM
- Use
- Wet or dry
- Model
- 644030
3M 62023 Multi-Purpose Reusable Respirator, OV/AG/P100, Medium
Covers both concrete dust while grinding and vapors while coating.
A garage floor project has two different breathing hazards. Grinding concrete throws fine silica dust into the air, and two-part coatings and etchers give off vapors in a closed garage. A dust mask handles neither of them well, which is why a half-face respirator with combination cartridges is a sensible part of the kit.
The 62023 comes ready to use with OV/AG/P100 cartridges, so the same mask covers the grinding day and the coating day. 3M marks it for workplace use, and like any respirator it only works with a good seal against the face.
Pro tip Do a quick seal check every time you put it on: cover the cartridges with your palms and breathe in gently. The mask should pull slightly against your face and stay there. If air leaks in, adjust the straps before you start.
Why we like it
- ✓NIOSH-approved OV/AG/P100 combination cartridges
- ✓P100 filter is oil-proof, at least 99.97% efficient against particles per 3M
- ✓Organic vapor and acid gas protection in the same cartridge
- ✓Reusable, with adjustable head straps
Keep in mind
- !This listing is size Medium only — check the fit before a long job
- !Cartridges wear out and need replacing; beards prevent a proper seal
- Cartridges
- OV/AG/P100 combination (60923)
- Filter class
- P100
- Type
- Reusable half facepiece
- Size
- Medium
- Model
- 62023
GIANTMAN Epoxy Spiked Shoes for Epoxy Flooring (ESC-01, Medium)
Lets you walk onto the wet floor to fix a spot or reach the middle.
Once the coating is down, the floor is wet from wall to wall, but you may still need to walk on it: to scatter flakes evenly across the middle, to roll out a thin spot, or to pick out a fallen hair. Spiked shoes lift your feet off the surface on narrow points, so you leave small holes instead of footprints.
These strap over your own boots with two buckles. They’re most useful on larger floors where you can’t reach the center from the edge, and on thicker self-leveling coatings that close up behind the spikes.
Pro tip Put the shoes on outside the garage and walk in on a clean scrap of cardboard. Anything stuck to the spikes, like grit, leaves or dust, ends up in your fresh coating.
Why we like it
- ✓13 spikes per shoe, fixed with locking nuts
- ✓Two snap-lock straps fit over work boots or sneakers
- ✓12 × 5.1 in sole plate
- ✓Medium and large-wide versions on the listing
Keep in mind
- !Lesser-known brand compared with the rest of this kit
- !Spike holes in a thin roll-on coat don't always level out on their own — step lightly and re-roll if needed
- Spikes
- 13 per shoe, about 3/4 in assembled
- Sole plate
- 12 × 5.1 in
- Straps
- 2 per shoe, snap-lock buckles
- Size
- Medium
- Model
- ESC-01
Rust-Oleum Decorative Color Chips, Gray Blend, 1 lb
Extra flakes for a denser speckled finish that hides dust and flaws.
Most garage floor kits include a small packet of flakes, enough for a light sprinkle. That’s fine for a subtle look, but the speckled “showroom” floors in photos usually have far more. Flakes also hide dust, tire marks and small patches in the concrete underneath, which a solid gray coat tends to show.
These are Rust-Oleum’s own chips, so they match the RockSolid gray, and they work with other brands’ coatings too. You throw them onto the coating while it’s still wet, and they bond as it cures.
Pro tip Throw the flakes up into the air and let them fall, rather than flinging them at the floor. They land flat and spread more evenly, without clumps where your hand released them.
Why we like it
- ✓Works with one-part and two-part concrete floor coatings
- ✓Gray, white, black and blue blend
- ✓Rust-Oleum lists 125–250 sq ft per bag, depending on density
- ✓Several blends you can mix for a custom look
Keep in mind
- !Flakes add texture; a full broadcast usually needs a clear topcoat for a smooth, easy-to-sweep surface
- !Coverage depends a lot on how heavily you throw them
- Weight
- 1 lb (454 g)
- Color
- Gray Blend (gray, white, black, blue)
- Coverage
- 125–250 sq ft per bag (per Rust-Oleum)
- Use
- Broadcast onto wet coating
- Model
- 301359